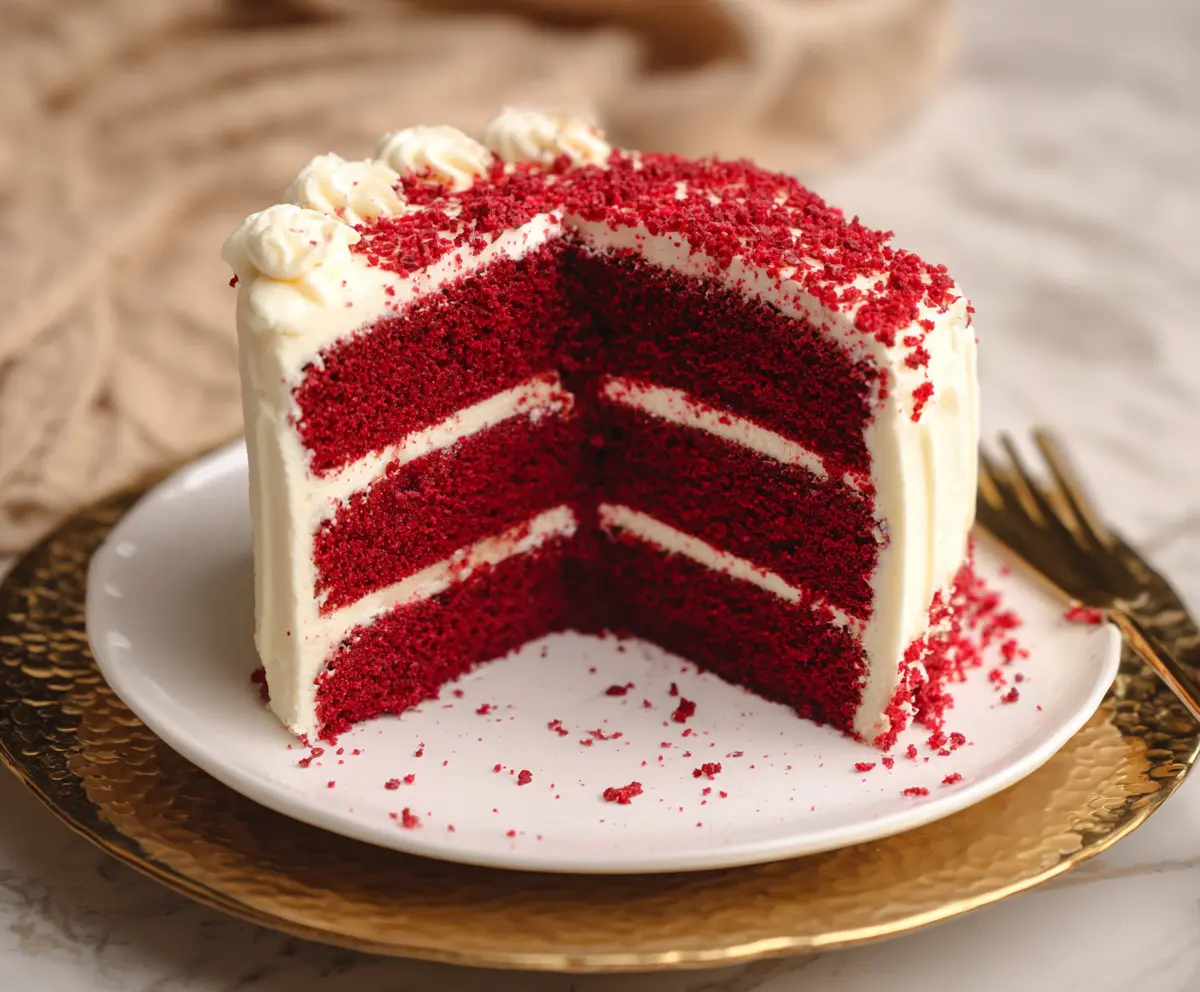
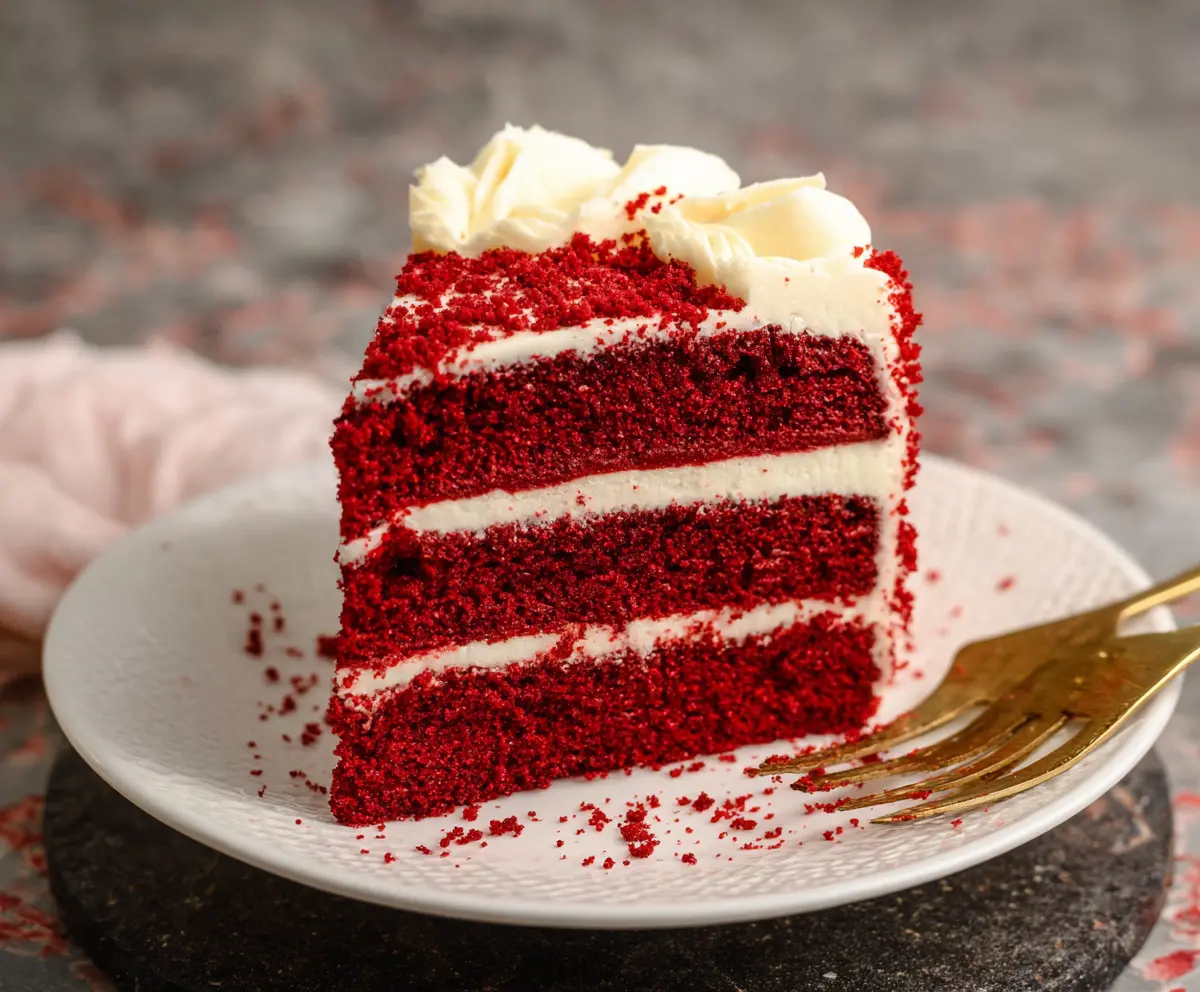
Red Velvet Cake is a stunning treat with its bright red color and smooth cream cheese frosting. It’s soft and fluffy, making it a favorite for celebrations!
Let’s be real, who can resist that rich taste? I love serving it at parties. Just a slice always brings smiles—especially when everyone fights for the last piece! 🎂
Key Ingredients & Substitutions
All-Purpose Flour: This is the base of the cake. If you’re looking for a gluten-free option, you can substitute with a 1:1 gluten-free flour blend. I’ve tried it, and it works quite well!
Buttermilk: Buttermilk adds moisture and tang. You can make your own by mixing a cup of milk with a tablespoon of vinegar or lemon juice; let it sit for 5-10 minutes. It’s a quick and easy fix!
Red Food Coloring: The signature color of red velvet cake comes from food coloring. If you’re looking for a natural alternative, beet juice is a friendlier substitution. It gives a beautiful color too!
Cream Cheese: This is key to that rich frosting flavor. If you’re vegan or avoiding dairy, try using a plant-based cream cheese or even a coconut whipped topping for a tasty alternative.
Why Is Proper Mixing Important?
The mixing of ingredients plays a big role in creating the right texture for your cake. Start by carefully mixing your dry ingredients. Then, mix the wet ingredients until smooth. The key is to combine them without overmixing, as this can lead to a dense cake.
- Gently fold the wet ingredients into the dry until just combined. This keeps the texture light and fluffy!
- Ensure ingredients are at room temperature, especially eggs and buttermilk, for a better emulsion.
How Can You Achieve a Beautiful Frosting Finish?
The cream cheese frosting is just as important as the cake itself! To get a smooth, professional-looking finish, follow these tips:
- Beat the cream cheese and butter until fluffy before adding powdered sugar. This ensures a smooth base.
- Add sugar gradually to avoid a messy cloud while mixing!
- Use a spatula to swipe around the edges for clean lines, and chill the cake for an hour to firm up the frosting.
With these tips and insights, your Red Velvet Cake is sure to impress! Enjoy the baking!
Red Velvet Cake
Ingredients You’ll Need:
For the Cake:
- 2 1/2 cups (312g) all-purpose flour
- 1 1/2 cups (300g) granulated sugar
- 1 teaspoon baking soda
- 1 teaspoon fine salt
- 1 teaspoon cocoa powder (unsweetened)
- 1 1/2 cups (360ml) vegetable oil
- 1 cup (240ml) buttermilk, room temperature
- 2 large eggs, room temperature
- 2 tablespoons (30ml) red food coloring
- 1 teaspoon vanilla extract
- 1 teaspoon distilled white vinegar
For the Cream Cheese Frosting:
- 16 oz (450g) cream cheese, softened
- 1/2 cup (115g) unsalted butter, softened
- 4 cups (480g) powdered sugar, sifted
- 1 teaspoon vanilla extract
How Much Time Will You Need?
This delightful cake will take around 15 minutes to prepare, and then you will bake it for about 25-30 minutes. After baking, it’s best to let it cool, which takes around 30 minutes. Finally, you can frost it, and chilling the cake will take about an hour before slicing. So, plan for a total of about 2 hours and 15 minutes from start to finish (with chilling time included).
Step-by-Step Instructions:
1. Preheat the Oven:
Start by preheating your oven to 350°F (175°C). Next, grease and flour three 8-inch round cake pans or line the bottoms with parchment paper to prevent sticking.
2. Prepare the Dry Ingredients:
In a large bowl, sift together the flour, sugar, baking soda, salt, and cocoa powder. This step helps to incorporate air and ensures that everything mixes evenly. Set the dry ingredients aside.
3. Combine the Wet Ingredients:
In a separate bowl, whisk together the vegetable oil, buttermilk, eggs, red food coloring, vanilla extract, and vinegar until everything is well combined. The mixture should be smooth and creamy.
4. Mix It Together:
Slowly add the wet ingredients to the dry ingredients, mixing gently until just combined. Be careful not to overmix to keep the cake light and fluffy!
5. Bake the Cake:
Divide the batter evenly among the three prepared cake pans. Pop them into the oven and bake for 25-30 minutes, or until a toothpick inserted in the center comes out clean. This means it’s perfectly baked!
6. Cool the Cakes:
Once baked, remove the cakes from the oven and let them cool in the pans for about 10 minutes. After that, transfer them to a wire rack to cool completely.
7. Prepare the Cream Cheese Frosting:
While your cakes are cooling, prepare the frosting. In a mixing bowl, beat the softened cream cheese and butter together with an electric mixer on medium speed until creamy and smooth.
8. Add Sugar and Flavor:
Gradually add the sifted powdered sugar, one cup at a time, mixing on low speed until fully incorporated. After that, increase to medium speed and beat until fluffy. Don’t forget to mix in the vanilla extract for extra flavor!
9. Frost the Cake:
Once your cakes are completely cool, place one layer on a serving plate. Spread a generous amount of cream cheese frosting over the top. Add the second layer, frost again, and repeat with the third layer!
10. Finishing Touches:
Frost the sides and top of the cake with any remaining cream cheese frosting. For an extra touch, you can optionally sprinkle some red velvet cake crumbs or decorations on top to give it a classic look.
11. Chill and Serve:
Chill the cake in the refrigerator for at least an hour before slicing so the frosting can set nicely and the flavors meld together, making every bite delightful!
Enjoy your delicious Red Velvet Cake with its rich flavor and velvety texture. You’ll be the star of any gathering!
Can I Use Different Food Coloring?
Absolutely! While red food coloring is traditional, you can use gel colors or even natural alternatives like beet juice for a more organic approach. Just note that the color might not be as vibrant.
How Should I Store Leftovers?
Store any leftover cake in an airtight container in the fridge for up to 3-4 days. You can also freeze slices wrapped tightly in plastic wrap and foil for up to 2 months, just thaw them in the fridge when you’re ready to enjoy!
Can I Make This Cake Gluten-Free?
Yes, you can substitute the all-purpose flour with a 1:1 gluten-free flour blend. Make sure it contains xanthan gum, which helps mimic the texture of regular flour!
Can I Reduce the Sugar in the Frosting?
You can reduce the sugar if you’d like a less sweet frosting, but remember that cream cheese frosting relies on sugar for its texture. Start with a smaller amount and adjust to taste; adding a pinch of salt can help balance sweetness!