These Pumpkin Truffles are a tasty treat that combines creamy pumpkin and rich chocolate. They are perfect for fall and make your taste buds giggle with joy!
Making truffles is fun, and I love rolling them in chocolate! They’re a hit at gatherings, and let’s face it, who can resist a sweet little bite of pumpkin goodness? 😋
Key Ingredients & Substitutions
Pumpkin Puree: Canned pumpkin puree is the star here! Don’t grab pumpkin pie filling as it has added sugar and spices. If you have fresh pumpkin, you can roast and puree it yourself for a fresher flavor.
Cream Cheese: This ingredient adds creaminess. You can swap it with mascarpone for a richer taste, or use vegan cream cheese if you’re avoiding dairy.
Powdered Sugar: It’s important for sweetness and texture. If you prefer less sugar, you can reduce the amount or use powdered erythritol for a low-sugar version.
Chocolate Coating: I love dark chocolate for a rich flavor, but you can use white or milk chocolate if you like it sweeter. Just remember to adjust your toppings as per the sweetness of the chocolate you choose.
Graham Crackers: These are optional but add a nice crunch. You can use crushed cookies or nuts as a substitute if you want a different flavor or if you’re gluten-free.
How Do I Get Smooth Chocolate Coating on My Truffles?
Getting that beautiful chocolate coating can be tricky, but here’s how to make it easier:
- Melt the chocolate in short bursts in the microwave to avoid burning it. Stir well after each interval until smooth.
- Dip a chilled pumpkin ball into the chocolate using a fork. Tap it gently on the side of the bowl to shake off excess chocolate.
- Work quickly but carefully! If the chocolate starts to harden, reheat it slightly to keep it fluid.
- Don’t forget to decorate with graham cracker crumbs before the chocolate sets for the best presentation!
With these steps, you’ll get a smooth, shiny truffle every time!
How to Make Pumpkin Truffles
Ingredients You’ll Need:
For the Truffle Filling:
- 1 cup canned pumpkin puree (not pumpkin pie filling)
- 8 oz cream cheese, softened
- 2 cups powdered sugar
- 1 1/2 tsp pumpkin pie spice
- 1 tsp vanilla extract
For the Coating:
- 12 oz dark or semisweet chocolate, melted (for coating)
For Topping:
- 1/2 cup crushed graham crackers or cookie crumbs (optional, for topping)
- White chocolate for drizzling (optional)
How Much Time Will You Need?
This delightful recipe will take about 20 minutes of active prep time, plus 2 hours of chilling in the refrigerator and 30 minutes in the freezer. So, grab your favorite pumpkin spice latte and let these truffles chill while you relax!
Step-by-Step Instructions:
1. Make the Pumpkin Mixture:
Start by grabbing a large bowl. Combine the canned pumpkin puree, softened cream cheese, powdered sugar, pumpkin pie spice, and vanilla extract. Mix everything together until it’s super smooth and blended well—no lumps allowed! It should look like a creamy, fluffy mixture.
2. Chill the Mixture:
Once your mixture is ready, cover the bowl with plastic wrap or a lid. Pop it in the refrigerator for at least 2 hours or until it’s firm enough to scoop. This will make it much easier to shape later on!
3. Shape the Truffles:
After chilling, take the mixture out of the fridge. Use a small cookie scoop or a spoon to portion out the filling into bite-sized balls. Place each ball on a parchment-lined baking sheet. They don’t have to be perfect, just try to keep them uniform in size.
4. Freeze for Firmness:
Now it’s time to freeze! Pop the baking sheet in the freezer for about 30 minutes. This helps the truffles firm up, making the dipping process much easier and less messy.
5. Melt the Chocolate:
While the truffles are chilling, melt your chocolate. Place it in a microwave-safe bowl and heat it in 30-second intervals. Stir between each interval until the chocolate is smooth and fully melted. Be careful not to overheat it!
6. Coat the Truffles:
Once your truffles are nice and firm, take them out of the freezer. Dip each ball into the melted chocolate, making sure to coat it completely. Use a fork to lift it out, letting any excess chocolate drip off before placing it back on the parchment paper.
7. Add Toppings:
While the chocolate is still wet, sprinkle crushed graham crackers or cookie crumbs on top for a delightful crunch. If you want to get fancy, melt some white chocolate and drizzle it over the top of each truffle for an extra flair!
8. Let Them Set:
Now, place the baking sheet back in the refrigerator for about 15-20 minutes to let the chocolate set. Presto! Your truffles are almost ready!
9. Serve and Enjoy:
Once the chocolate has hardened, your Pumpkin Truffles are ready to be served! They are delicious served chilled, packed with creamy pumpkin flavor, and have a delightful chocolatey coating. Enjoy them at parties or share them with loved ones!
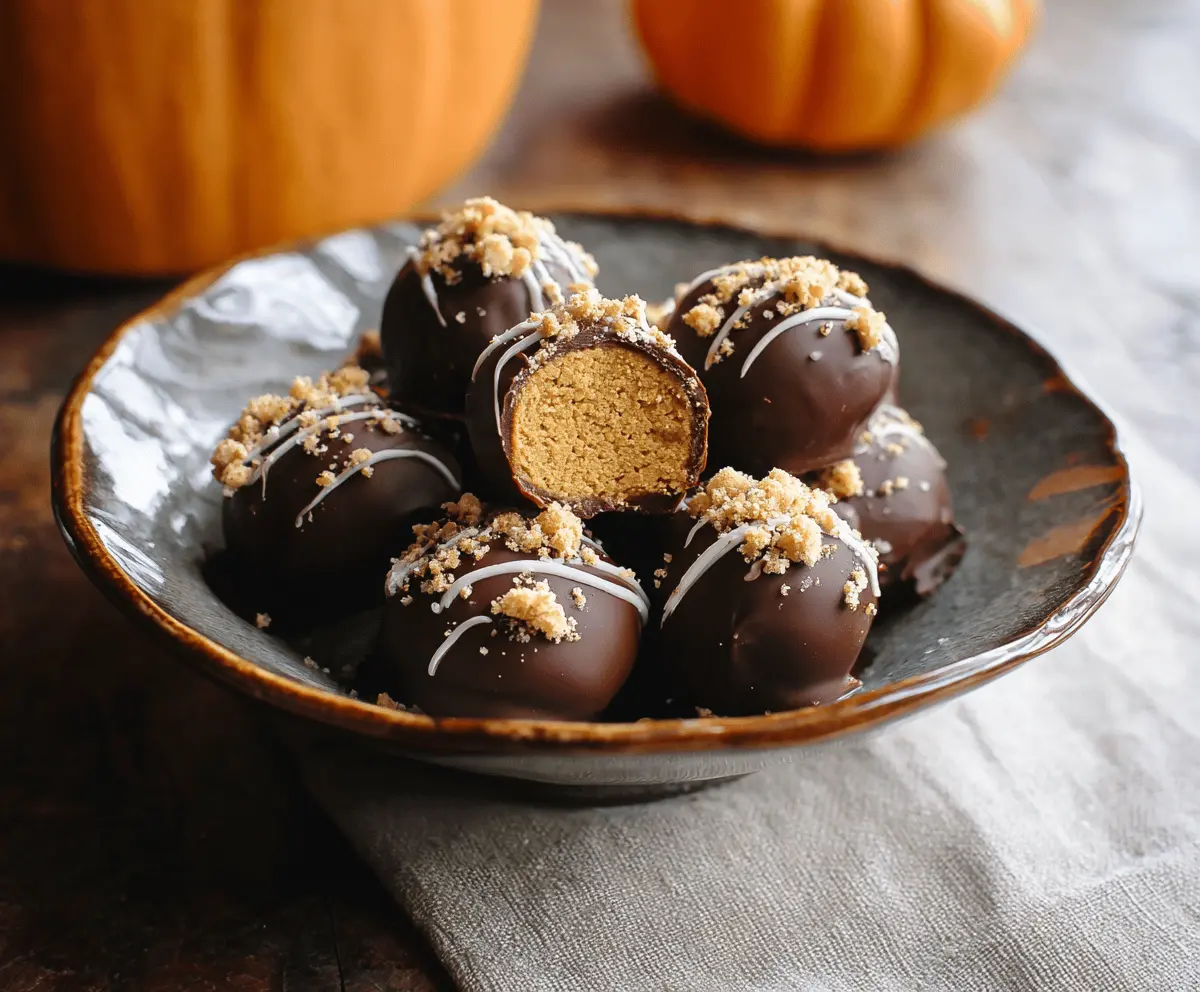
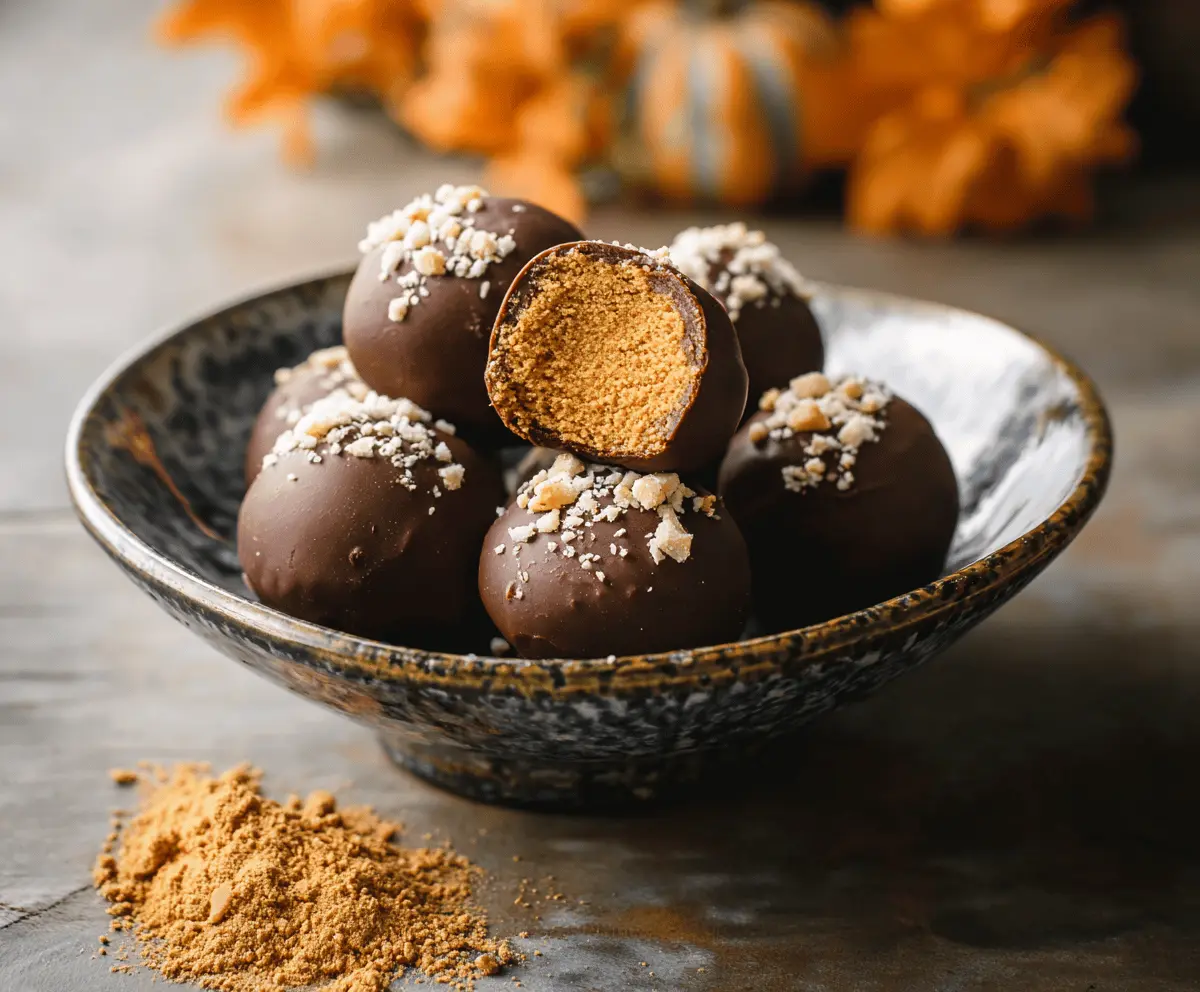
These truffles are rich, creamy pumpkin bites coated in smooth dark chocolate and garnished with crumbly topping and delicate white chocolate drizzles—perfect for autumn or holiday festivities!
Can I Use Fresh Pumpkin Instead of Canned?
Absolutely! You can roast and puree fresh pumpkin for this recipe. Just make sure to drain any excess moisture to avoid a runny mixture. Canned pumpkin is more convenient, but fresh offers a lovely flavor!
How Should I Store Leftover Truffles?
Store any leftover truffles in an airtight container in the refrigerator for up to a week. You can also freeze them for up to 3 months. Just make sure they are well wrapped to prevent freezer burn!
Can I Use Different Types of Chocolate for Coating?
Yes, you can use milk chocolate or white chocolate if you prefer a sweeter taste! However, keep in mind that dark chocolate balances the sweetness of the pumpkin, so adjust sugar levels if necessary.
Why Do I Need to Refrigerate the Mixture?
Refrigerating the mixture helps it firm up, making it easier to scoop and shape into truffles. This step ensures that the truffles keep their shape during the chocolate coating process!