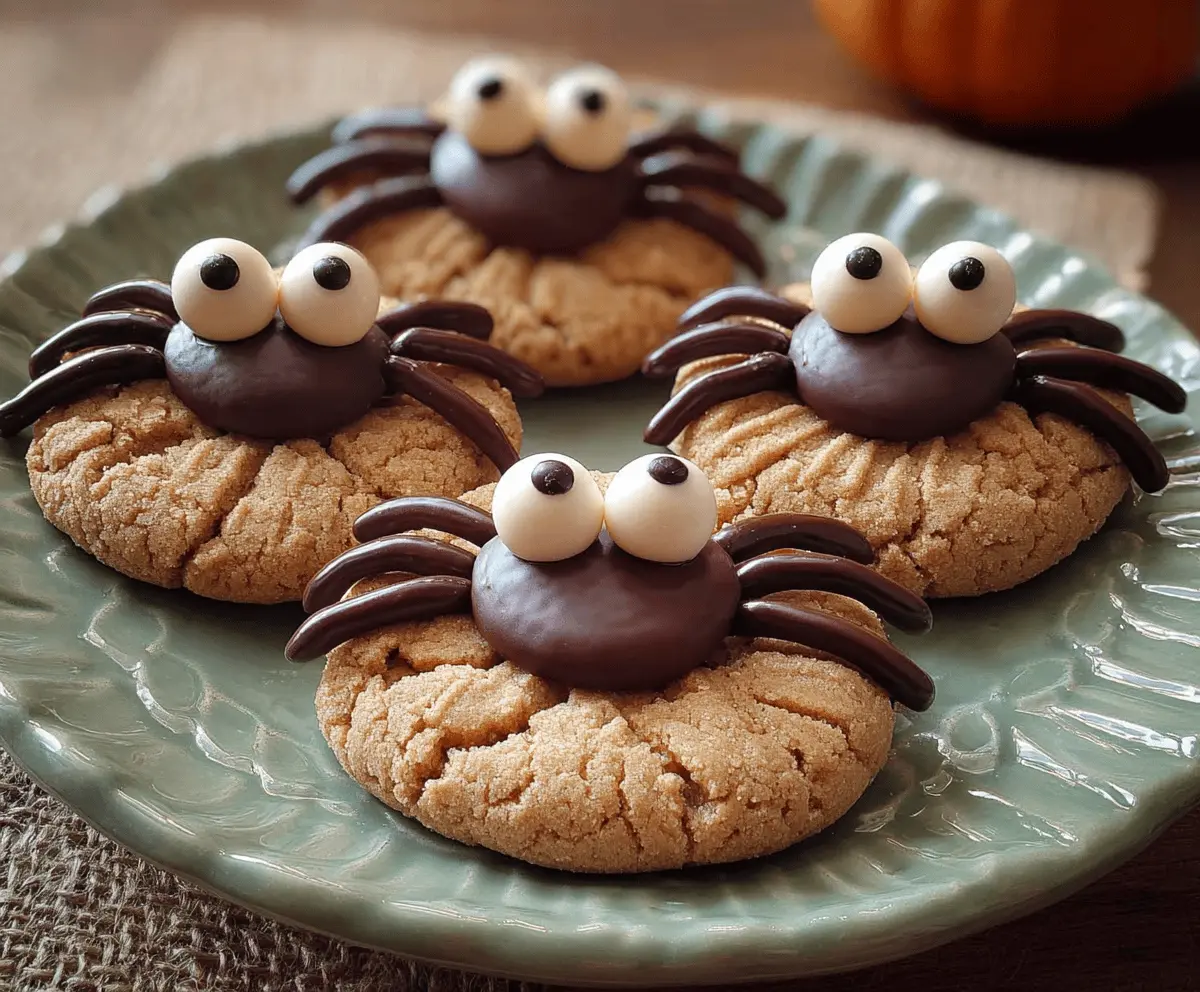
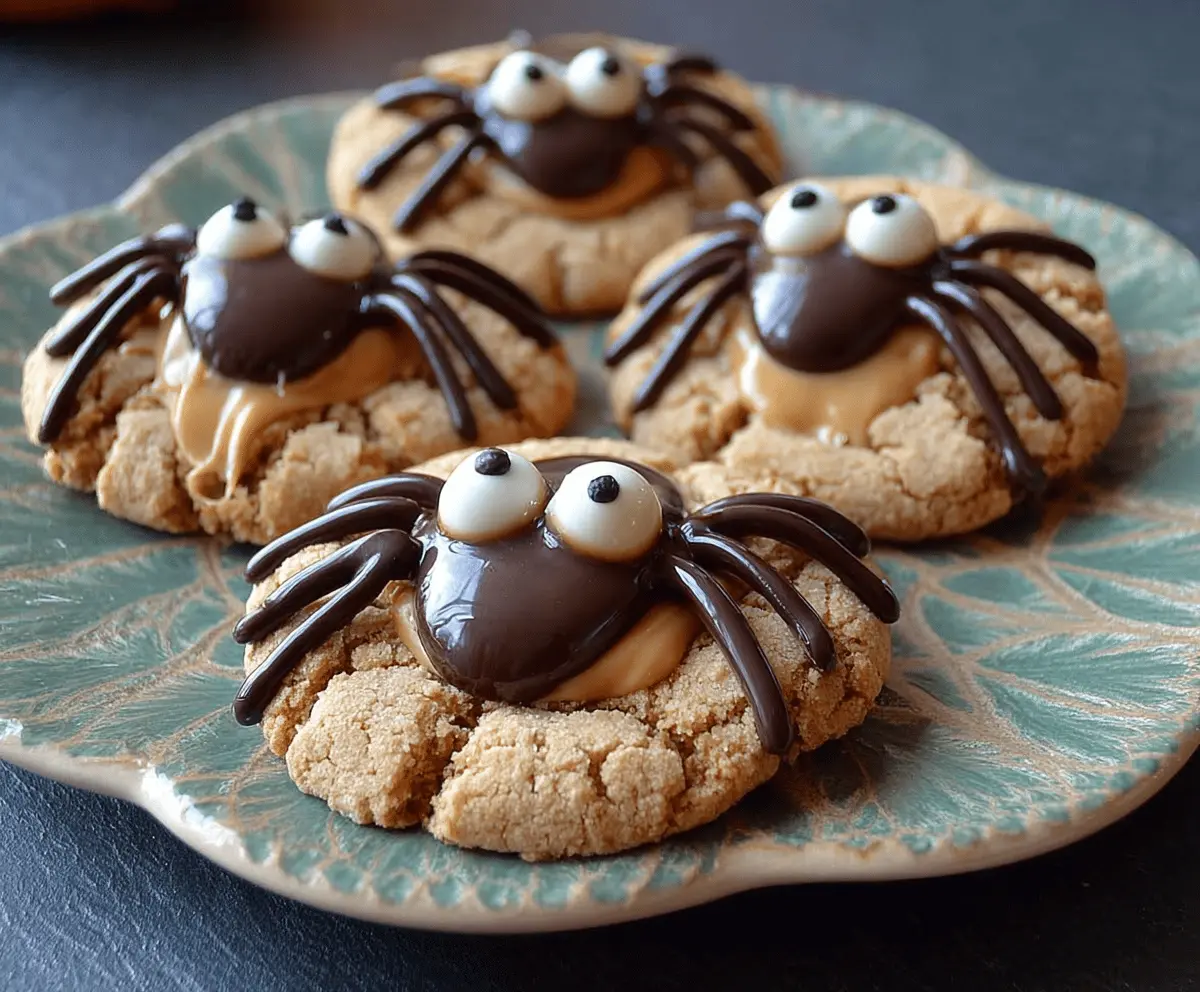
These playful Peanut Butter Spider Cookies are a fun treat! They’re soft, chewy, and topped with chocolate spiders, making them a hit for kids and adults alike.
Every time I bake these cookies, I can’t help but giggle at the chocolate legs. They’re perfect for Halloween or any time you want to scare up some fun! 🍪🕷️
Key Ingredients & Substitutions
Peanut Butter: You can use either creamy or chunky peanut butter, depending on your texture preference. If you need a nut-free option, try sunflower seed butter. It provides a similar consistency without the nuts!
Chocolate-Covered Peanut Butter Cups: These are vital for the spider bodies! If you can’t find them, you can substitute with chocolate truffles or any round chocolate candy that has a creamy filling.
Candy Eyeballs: These add the fun look of spiders. If you can’t find them, mini chocolate chips or even small round candies work well too!
Chocolate Licorice: If you’re not a fan of licorice, you can use pretzel sticks, toothpicks, or even thin chocolate-covered pretzels for the spider legs!
How Do I Make My Cookies Chewy and Delicious?
The key to chewy cookies is the butter-to-sugar ratio. Cream the butter with both granulated and brown sugars. Brown sugar adds moisture and chewiness. Don’t overmix once you add the flour; mix just until combined to keep the cookies tender.
- Don’t skip chilling the dough for 10-15 minutes if you want thicker cookies.
- Monitor baking time; slightly underbaked cookies will remain soft as they cool.
- Press the chocolate cups into the warm cookies immediately; this helps them stick well.
Peanut Butter Spider Cookies
Ingredients You’ll Need:
For The Cookie Base:
- 1/2 cup unsalted butter, softened
- 1/2 cup granulated sugar
- 1/2 cup packed light brown sugar
- 1/2 cup peanut butter (creamy or chunky)
- 1 large egg
- 1 teaspoon vanilla extract
- 1 cup all-purpose flour
- 1/2 teaspoon baking soda
- 1/4 teaspoon salt
For The Spider Decoration:
- 24 chocolate-covered peanut butter cups (mini or small size)
- 48 candy eyeballs (2 per cookie)
- 48 pieces of chocolate licorice or chocolate sticks, cut into halves or thirds for spider legs (6 legs per side per cookie)
- Optional: small dab of frosting or melted chocolate for securing eyes
How Much Time Will You Need?
This recipe takes about 15 minutes to prepare, plus an additional 10-12 minutes to bake. Let’s not forget a bit of cooling time to set up the chocolate and give your cookies their fun spider look. All in all, you’re looking at around 30-40 minutes!
Step-by-Step Instructions:
1. Prepare Your Oven and Baking Sheets:
First things first, preheat your oven to 350°F (175°C). Grab two baking sheets and line them with parchment paper so your cookies don’t stick.
2. Cream the Butter and Sugars:
In a large bowl, combine your softened butter, granulated sugar, and brown sugar. Use a hand mixer or a spatula to mix everything together until it’s light and fluffy—this process is important for fluffy cookies.
3. Mix in the Peanut Butter and Egg:
Add the peanut butter, egg, and vanilla extract to the bowl. Mix until everything is well combined and smooth. Your batter should be creamy and delicious-looking!
4. Combine the Dry Ingredients:
In another bowl, whisk together the flour, baking soda, and salt. This helps to evenly disperse the baking soda throughout the flour.
5. Combine Wet and Dry Ingredients:
Gradually add the flour mixture to the wet ingredients, stirring just until combined. Be careful not to overmix; you want those cookies to stay soft!
6. Scoop and Shape Your Cookies:
Using a tablespoon, scoop out the dough and place it on the prepared baking sheets, spacing them about 2 inches apart. Lightly flatten each dough ball with a fork to create a nice crisscross pattern on top.
7. Bake the Cookies:
Pop the baking sheets into the oven and bake for 10-12 minutes. Keep an eye on them—they should be lightly golden around the edges and set in the middle.
8. Add the Spider Ingredient:
Once baked, take the cookies out of the oven and immediately press one chocolate-covered peanut butter cup into the center of each warm cookie. This should melt just enough to secure the candy in place.
9. Create Your Spiders:
Let the cookies cool slightly so the chocolate cups are firm but still soft. Now it’s time to build your spiders! Attach the candy eyeballs to the top of each peanut butter cup using a small dab of frosting or melted chocolate to help them stick.
10. Add Spider Legs:
Take the chocolate licorice pieces and insert them around the sides of the peanut butter cup to create the spider legs. You’ll want three pieces on each side for a full set of legs.
11. Cool and Serve:
Allow your cookies to cool completely on a wire rack so that the chocolate sets. Once cooled, these delicious and spooky Peanut Butter Spider Cookies are ready to be served. Enjoy your Halloween treat or share with friends!
Can I Use Natural Peanut Butter in This Recipe?
Yes, you can use natural peanut butter, but keep in mind that it can be runnier than regular peanut butter. This may affect the texture of your cookies slightly, so consider refrigerating it for a bit to thicken it up before using.
How Can I Make These Cookies Gluten-Free?
To make gluten-free Peanut Butter Spider Cookies, simply substitute the all-purpose flour with a 1:1 gluten-free flour blend. Ensure that other ingredients like baking soda are also gluten-free, and you’re all set!
What Should I Do if My Dough is Too Sticky?
If your cookie dough is too sticky to handle, you can refrigerate it for 15-30 minutes. This will help firm it up and make it easier to scoop and shape. Just remember to cover the bowl with plastic wrap or a lid!
How Should I Store Leftover Cookies?
Store any leftover cookies in an airtight container at room temperature for up to 3 days. If you want them to last longer, you can freeze them for up to 2 months. Just make sure to separate layers with parchment paper to prevent sticking!