I love a good breakfast that makes my mornings easy. Today, I’m sharing some of my favorite **overnight oats recipes** that make busy mornings so much better. You get to wake up to a delicious meal, ready to eat without any fuss.
These simple recipes are perfect for preparing the night before. You’ll find options for sweet, tangy, and even a little energizing. Let’s make your mornings tastier!
Jump to Recipe:
- 1. Honey Vanilla Overnight Oats
- 2. Zesty Lemon Cheesecake Overnight Oats
- 3. Energizing Matcha Latte Overnight Oats
Honey Vanilla Overnight Oats for Easy Mornings
This recipe brings together sweet honey and warm vanilla for a truly comforting breakfast. It’s a simple and classic combination that you can prepare ahead of time.
You’ll love how easy it is to make and how satisfying it tastes when you’re short on time in the morning.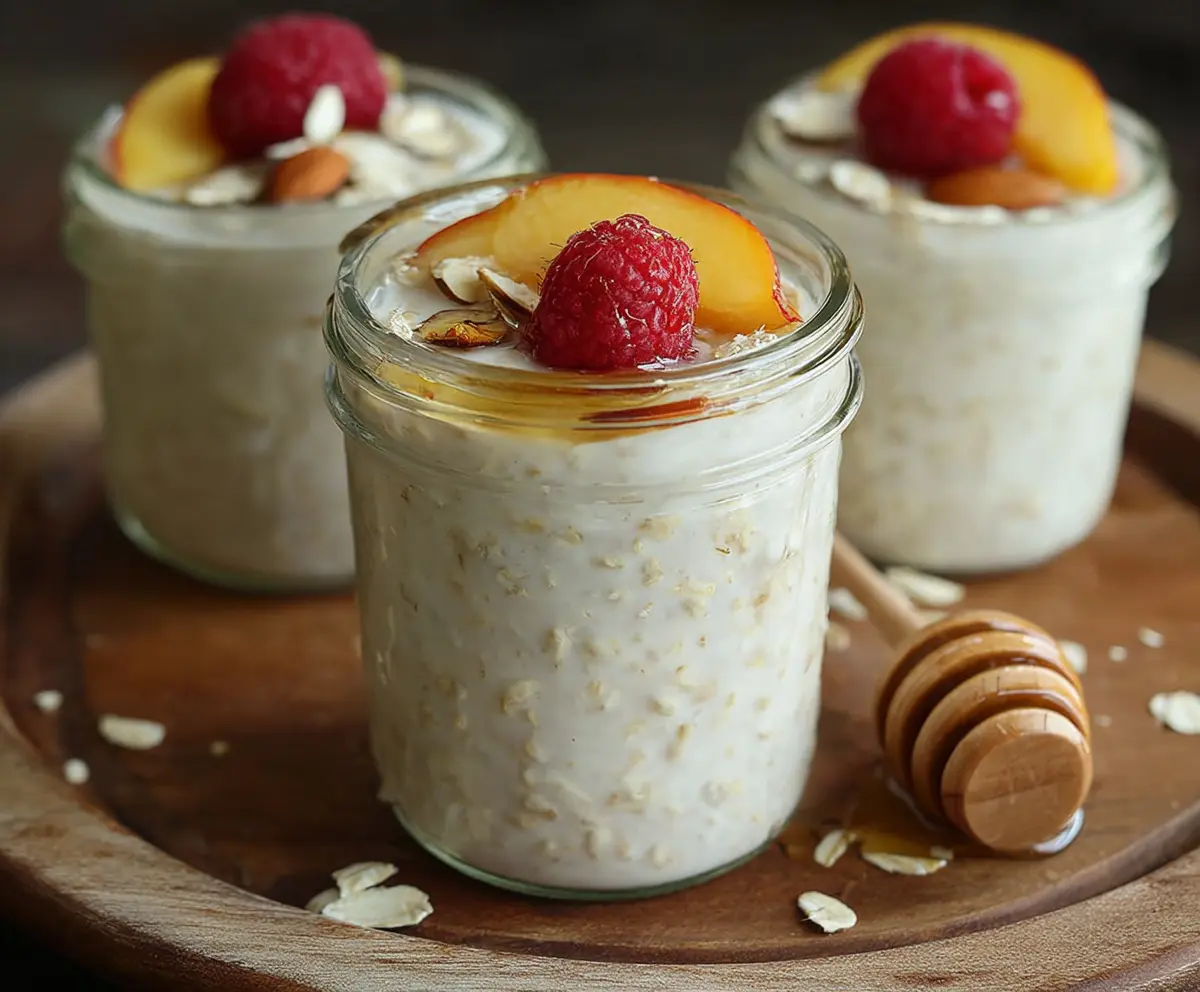
Key Ingredients & Tips for Honey Vanilla Oats
- Rolled Oats for Texture: Use old-fashioned rolled oats for the best creamy texture that still has some bite. Instant oats can get too mushy.
- Natural Sweetness: Honey adds a natural, gentle sweetness and a lovely taste to these oats. You can adjust the amount to your liking.
What You Need for Honey Vanilla Oats
- 1/2 cup rolled oats
- 1/2 cup milk (dairy or non-dairy)
- 1-2 tablespoons honey
- 1/2 teaspoon vanilla extract
- Pinch of salt
- Optional toppings: fresh berries, nuts, a sprinkle of cinnamon
⏱️ Time: 5 mins prep, 4+ hours chill🍽️ Yields: 1 serving
How to Make Honey Vanilla Overnight Oats
Step 1: Combine Ingredients
In a jar or container with a lid, combine the rolled oats, milk, honey, vanilla extract, and a pinch of salt. Stir everything together well until it’s fully mixed and no dry oats remain.
Step 2: Chill Overnight
Cover the jar tightly with its lid. Place it in the refrigerator for at least 4 hours, or ideally overnight. This allows the oats to soak up the liquid and become perfectly soft.
Step 3: Enjoy & Top
In the morning, open your jar of oats. Give them a quick stir. Add your favorite toppings like fresh berries, sliced banana, or a sprinkle of nuts before eating.
📝 Final Note on Honey Vanilla Oats
For a slightly thicker texture, you can add 1 tablespoon of chia seeds with the other ingredients. They soak up extra liquid beautifully.
Zesty Lemon Cheesecake Overnight Oats Recipe
Enjoy the bright taste of lemon with a creamy cheesecake feel in this easy breakfast. This recipe is a lovely way to start your day with a fresh and slightly tangy meal.
It’s a simple way to get that dessert-for-breakfast feel without a lot of effort in the morning.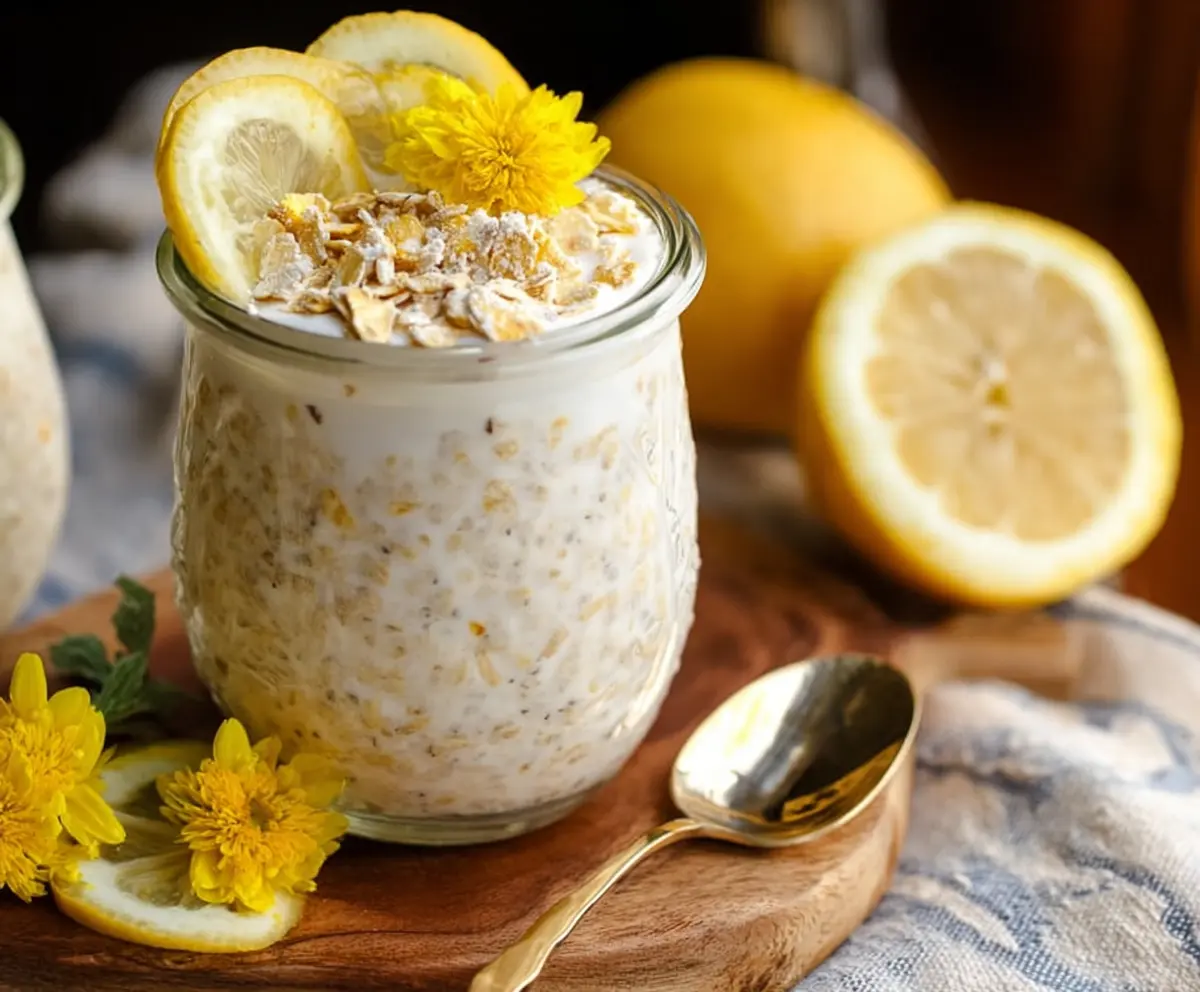
Key Ingredients & Tips for Lemon Oats
- Creamy Base: A small amount of Greek yogurt or softened cream cheese makes these oats extra creamy and gives them that cheesecake-like texture.
- Lemon Zest Punch: Don’t skip the lemon zest! It gives a stronger, fresher lemon taste that really makes the flavor pop more than just juice alone.
What You Need for Lemon Cheesecake Oats
- 1/2 cup rolled oats
- 1/2 cup milk (dairy or non-dairy)
- 1-2 tablespoons Greek yogurt or softened cream cheese
- 1 tablespoon lemon juice
- 1/2 teaspoon lemon zest
- 1-2 teaspoons maple syrup or honey
- Pinch of salt
- Optional toppings: graham cracker crumbs, fresh berries, lemon slices
⏱️ Time: 5 mins prep, 4+ hours chill🍽️ Yields: 1 serving
How to Make Lemon Cheesecake Overnight Oats
Step 1: Combine Wet Ingredients
In a jar, stir together the milk, Greek yogurt (or softened cream cheese), lemon juice, lemon zest, maple syrup, and a pinch of salt. Mix these well until the mixture is smooth.
Step 2: Add Oats & Mix Thoroughly
Add the rolled oats to the jar with the wet ingredients. Stir everything together very well, making sure all the oats are fully coated and no dry bits are left at the bottom.
Step 3: Refrigerate & Serve
Cover the jar and place it in the refrigerator overnight, or for at least 4 hours. In the morning, give the oats a good stir and add any toppings you like, such as graham cracker crumbs or fresh fruit.
📝 Final Note on Lemon Cheesecake Oats
For a truly tangy lemon flavor, you can add a little extra lemon zest right before serving. It brightens the whole dish.
Energizing Matcha Latte Overnight Oats for Breakfast
Get your morning energy boost with these easy matcha oats. They have a rich, earthy flavor and a smooth texture, making for a healthy and energizing start to your day.
If you love matcha lattes, you’ll really enjoy this convenient breakfast version.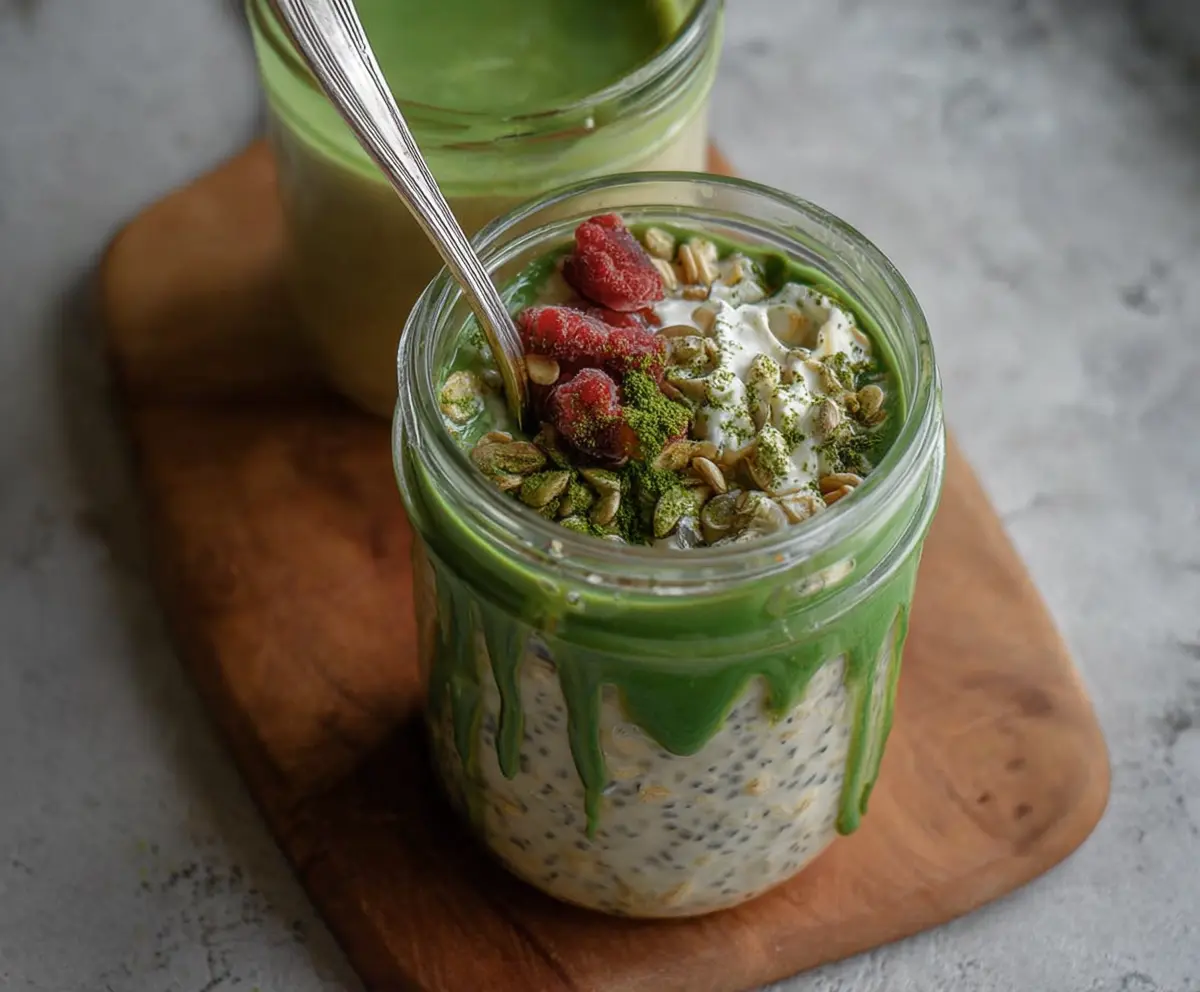
Key Ingredients & Tips for Matcha Oats
- Quality Matcha: Use a good quality ceremonial or culinary grade matcha powder. This will give you the best color and taste without a bitter edge.
- Balance Sweetness: Adjust the amount of sweetener to balance the matcha’s natural slight bitterness. Maple syrup or honey both work well here.
What You Need for Matcha Latte Oats
- 1/2 cup rolled oats
- 1/2 cup milk (dairy or non-dairy)
- 1 teaspoon matcha powder
- 1-2 teaspoons maple syrup or honey
- Pinch of salt
- Optional toppings: toasted coconut flakes, a sprinkle of matcha, fresh fruit
⏱️ Time: 5 mins prep, 4+ hours chill🍽️ Yields: 1 serving
How to Make Matcha Latte Overnight Oats
Step 1: Prepare Matcha Base
In a small bowl, whisk the matcha powder with just a splash of your milk until it’s smooth and there are no clumps. This step is important for a smooth, pleasant texture.
Step 2: Combine All Ingredients
Pour the smooth matcha mixture into your jar. Add the remaining milk, rolled oats, maple syrup, and a pinch of salt. Stir everything very well until the oats are fully coated and the color is even.
Step 3: Chill & Enjoy
Cover the jar and refrigerate for at least 4 hours or overnight. When you’re ready to eat, stir again and add any toppings you like, such as toasted coconut flakes or a little extra matcha powder.
📝 Final Note on Matcha Oats
If you prefer a stronger matcha taste, you can add a little extra powder, but always whisk it with a small amount of liquid first to avoid clumps.