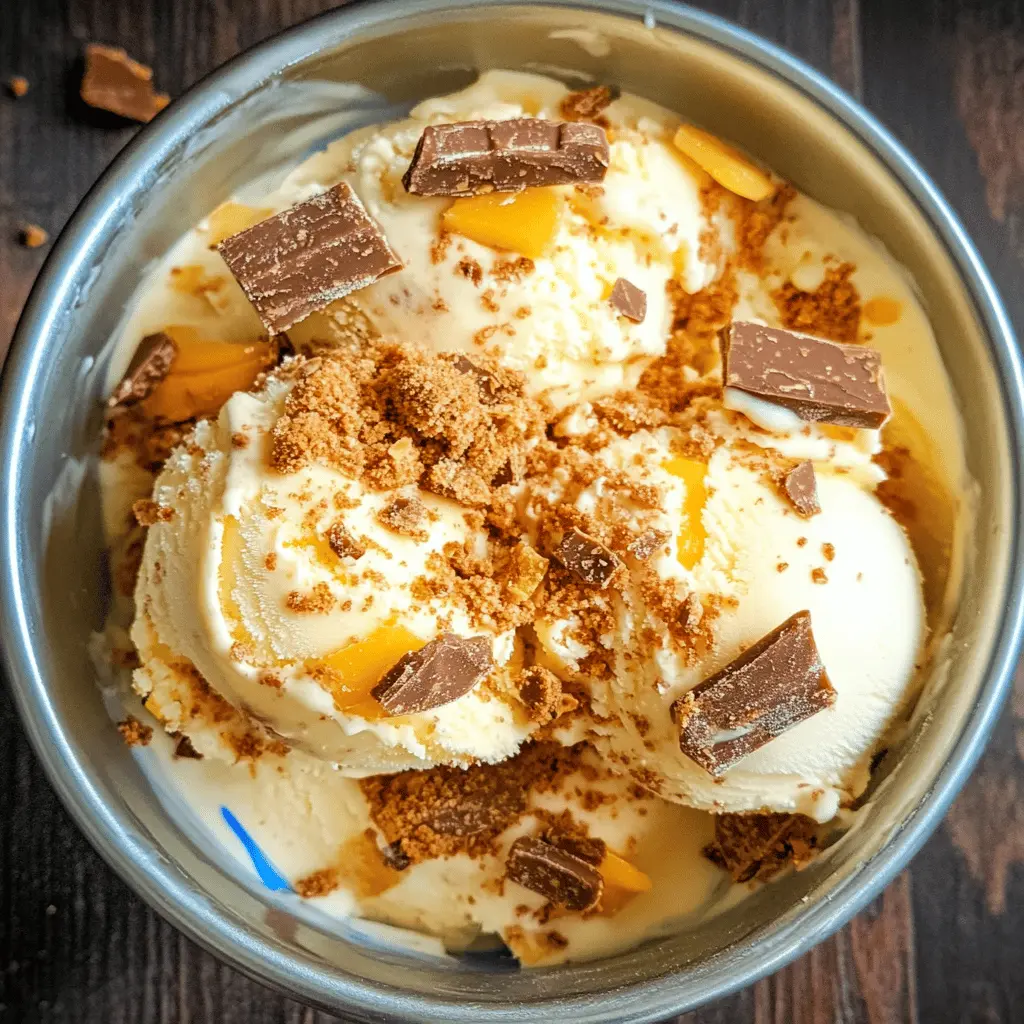
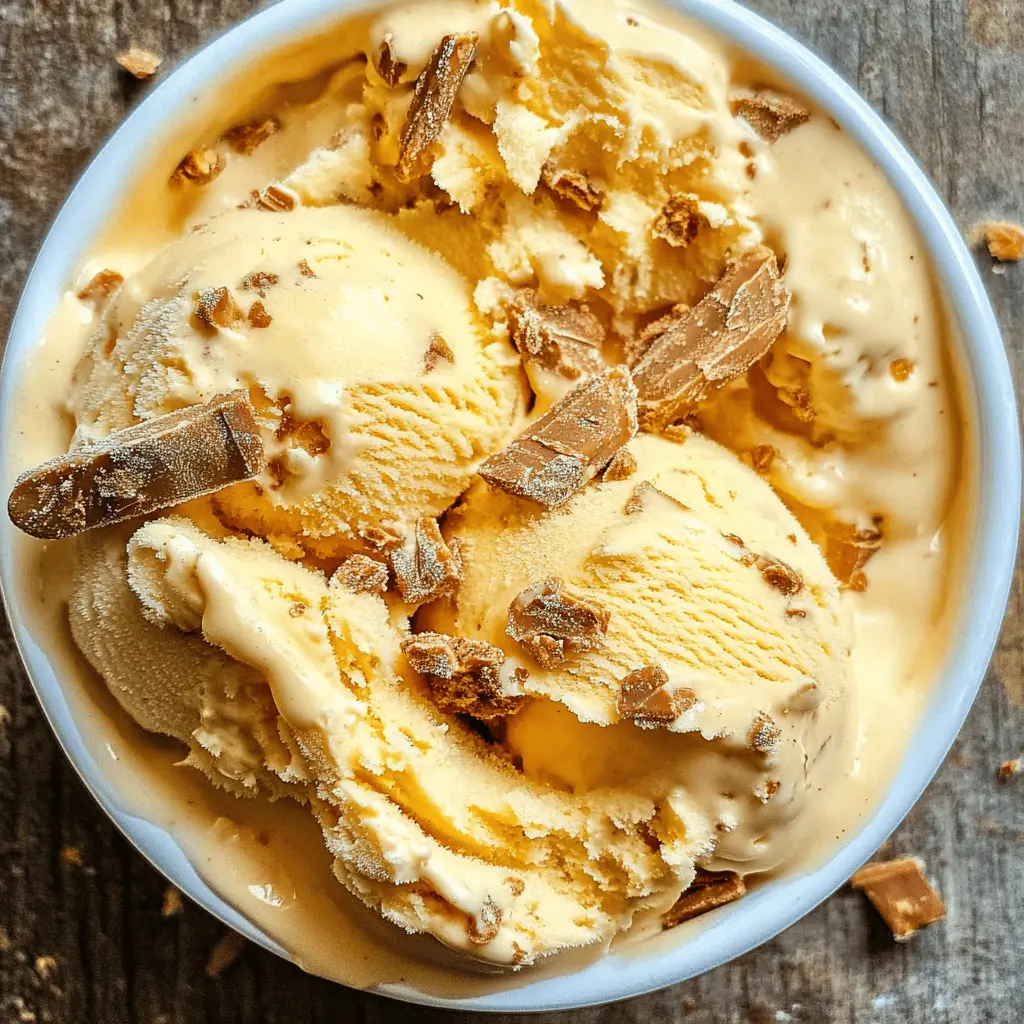
This Homemade Butterfinger Ice Cream is a creamy treat packed with crunchy pieces of Butterfinger candy. It’s sweet, rich, and oh-so-delicious!
I can’t resist sneaking spoonfuls while it’s freezing. Who could blame me? 🍦 A fun way to enjoy summer and a perfect dessert for any chocolate lover!
Ingredients & Substitutions
Heavy Cream: This is the key to rich texture in your ice cream. If you’re looking for a lighter option, you can use half-and-half, but the creaminess will be less pronounced.
Whole Milk: While whole milk gives a nice creaminess, you can substitute it with 2% milk or almond milk for a dairy-free version. Just keep in mind the flavor will slightly change.
Butterfinger Candy Bars: These are essential for that signature taste! If you can’t find them, try using any peanut butter chocolate candy, like Reese’s or even crushed chocolate-covered pretzels for a different twist.
Sweetened Condensed Milk: This ingredient makes the ice cream super creamy. It’s optional, but I recommend using it if you can. For a dairy-free alternative, coconut cream can work in a pinch!
How Do I Achieve the Best Ice Cream Texture?
Getting the perfect ice cream texture can be tricky, but it’s all about the mixing and churning. Start by whisking your base thoroughly until the sugar dissolved completely. This ensures a smooth mixture.
- Churn the ice cream mixture in your ice cream maker until it thickens. This usually takes about 20-30 minutes.
- Incorporate the crushed Butterfinger gently. This keeps the pieces intact and flavorful.
- Don’t skip the freezing step! Place the ice cream in a container and flatten the top. Cover tightly, allowing at least 4-6 hours in the freezer for that perfect scoop.
How to Make Homemade Butterfinger Ice Cream
Ingredients You’ll Need:
- 2 cups heavy cream
- 1 cup whole milk
- 3/4 cup granulated sugar
- 1 teaspoon vanilla extract
- 1/4 teaspoon salt
- 4-5 Butterfinger candy bars, crushed (approximately 1 cup)
- 1 cup sweetened condensed milk (optional for added creaminess)
How Much Time Will You Need?
This delicious Butterfinger ice cream takes about 15 minutes to prepare and about 4-6 hours to freeze. So, while it’s super simple to put together, just be sure to plan for some time to let it firm up in the freezer. Perfect for a warm day!
Step-by-Step Instructions:
1. Mix the Base:
In a large mixing bowl, combine the heavy cream, whole milk, granulated sugar, vanilla extract, and salt. Use a whisk to mix everything together until the sugar is completely dissolved. This will be the creamy base for your ice cream!
2. Add Sweetened Condensed Milk (Optional):
If you want an extra creamy ice cream, fold in the sweetened condensed milk at this stage. It will add a delightful richness to your ice cream. Gently stir it in until fully combined.
3. Churn the Ice Cream:
Pour the mixture into your ice cream maker. Follow the manufacturer’s instructions for churning, which usually takes about 20-25 minutes until the mixture starts to thicken nicely. Keep an eye on it; you want it smooth and creamy!
4. Add the Butterfinger:
Next, gently fold in the crushed Butterfinger candy bars, ensuring they are evenly distributed throughout the mixture. This will add delicious crunchy bits of peanut butter and chocolate to your ice cream!
5. Transfer and Freeze:
Now, transfer your ice cream into a lidded container, smoothing out the top with a spoon or spatula. If you’d like, sprinkle extra crushed Butterfinger on top for a fun garnish. Cover the container and place it in the freezer.
6. Let It Firm Up:
Allow your ice cream to freeze for at least 4-6 hours, or until it is firm to the scoop. Patience is key here, but it will be worth the wait!
7. Serve and Enjoy:
When you’re ready to enjoy, scoop your creamy Butterfinger ice cream into bowls and dig in! Perfect for hot days or anytime you need a sweet treat. Enjoy!
Can I Use Low-Fat Milk Instead of Whole Milk?
It’s best to stick with whole milk for the creamiest texture, but if you’re looking for a lighter alternative, you can use low-fat milk. Just keep in mind that the ice cream might be less creamy and a bit icier, so consider adding a little extra heavy cream or sweetened condensed milk to compensate!
How to Store Homemade Ice Cream?
Store your homemade Butterfinger ice cream in an airtight container in the freezer for up to 2 weeks. To keep it from getting too icy, smooth the top before sealing and place a piece of parchment paper directly on the surface. This helps keep air out!
What If I Don’t Have an Ice Cream Maker?
No problem! You can still make this ice cream without one. After mixing your ingredients, pour the mixture into a shallow dish and freeze it. Every 30 minutes, stir the mixture with a fork for about 2-3 hours to break up ice crystals until it reaches your desired consistency.
Can I Use Other Candy Bars Instead of Butterfinger?
Absolutely! Feel free to swap out Butterfinger for your favorite candy bar, like Reese’s, Snickers, or M&M’s. Just make sure to chop them into small pieces before folding them into the ice cream mixture to ensure even distribution!