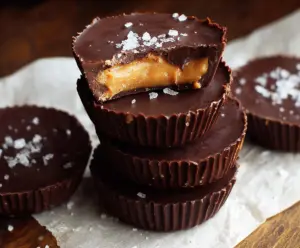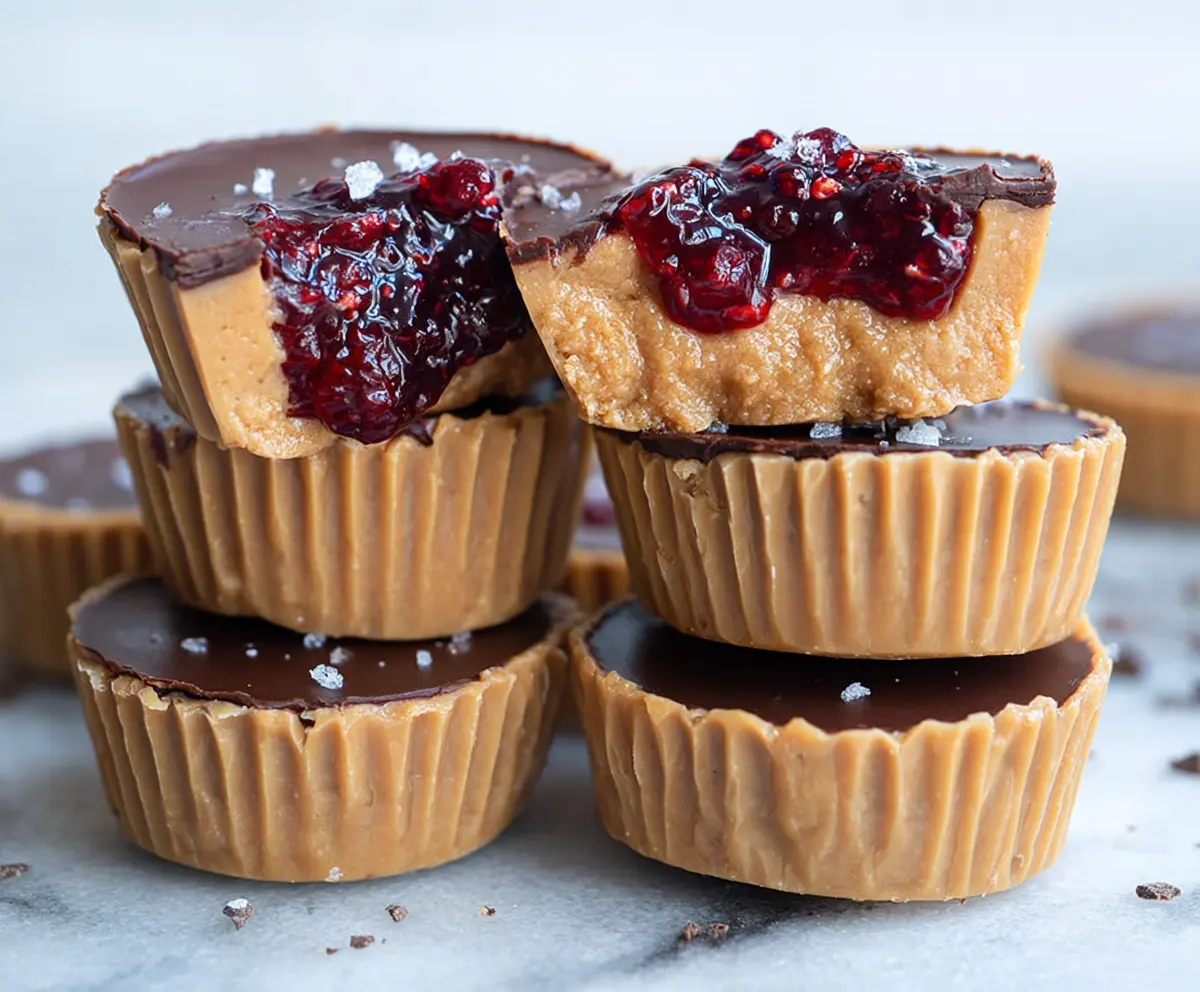
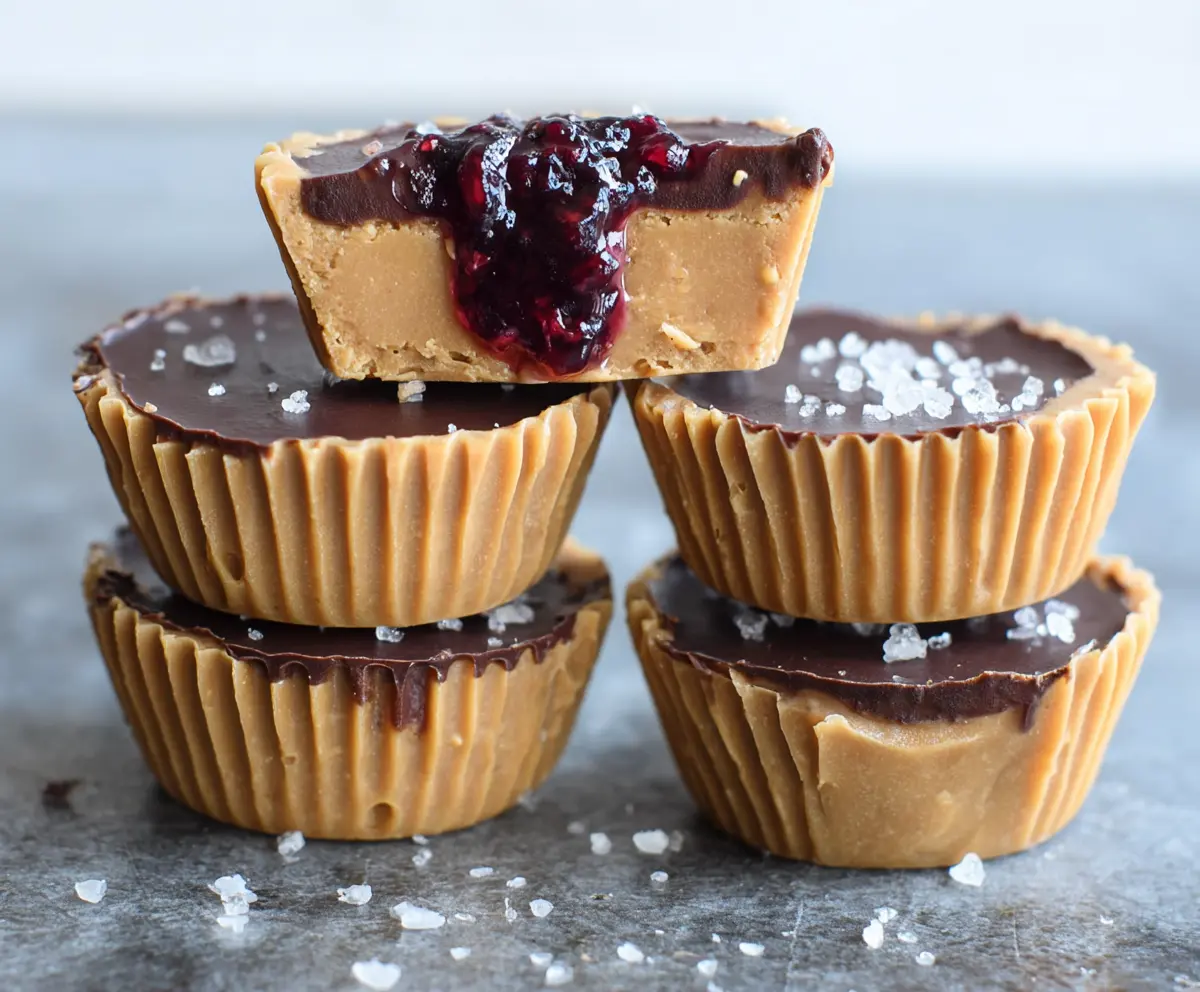
These Healthy Peanut Butter and Jelly Cups are a tasty treat made with creamy peanut butter and your favorite fruit jam, all wrapped in a chocolatey shell. Yum!
They’re super fun to make, and you’ll feel great enjoying something that tastes like dessert but has good ingredients! I love sharing them with friends, and they always ask for seconds! 😄
Key Ingredients & Substitutions
Peanut Butter: Using natural creamy peanut butter gives a rich flavor without added sugars or oils. If you’re looking for a nut-free option, try sunflower seed butter instead.
Coconut Oil: This adds a nice texture and helps everything stick together. If you don’t have coconut oil, you can substitute it with melted butter or any neutral oil like canola or grapeseed oil.
Sweetener: Pure maple syrup is my go-to for its lovely flavor, but honey works just as well! For a vegan option, stick to maple syrup. You can also use agave syrup or stevia for a low-calorie alternative.
Dark Chocolate: I recommend using dark chocolate with at least 70% cacao for a rich taste. If you’re dairy-free, many brands offer dairy-free chocolate options. You can use carob chips as another alternative.
Fruit Preserves: I love raspberry jam, but feel free to use any flavor you prefer! Look for no-added-sugar options or make your own for a healthier twist.
How Do I Achieve the Perfect Chocolate Layer?
Getting the chocolate layer just right can be tricky! Here are some easy steps to follow:
- Melt chocolate in the microwave carefully, using 20-second intervals and stirring in between. This prevents burning.
- Only cover the bottom of the muffin cups. You want it to be just enough to create a base that won’t overpower the other layers.
- Freezing the chocolate briefly helps it set, but don’t freeze it for too long as you want to layer the peanut butter on while it’s still slightly sticky.
This technique ensures you have a strong foundation for the delightful combination of flavors in your Healthy Peanut Butter And Jelly Cups!
How to Make Healthy Peanut Butter And Jelly Cups
Ingredients You’ll Need:
For the Base:
- 1 cup natural creamy peanut butter (no added sugar or salt)
- 1/4 cup coconut oil, melted
- 2-3 tablespoons pure maple syrup or honey
- 1 teaspoon vanilla extract
- Pinch of sea salt (plus extra for topping)
For the Chocolate Coating:
- 1/2 cup dark chocolate chips or chopped dark chocolate (70% cacao or higher)
For the Jelly Layer:
- 1/3 cup fruit preserves or jam (preferably no added sugar; raspberry or mixed berry works great)
How Much Time Will You Need?
This recipe will take approximately 15 minutes for preparation and around 30 minutes to chill in the freezer. Altogether, expect to spend about 45 minutes before enjoying these delicious treats!
Step-by-Step Instructions:
1. Prepare the Peanut Butter Base:
In a mixing bowl, add your creamy peanut butter, melted coconut oil, maple syrup (or honey), vanilla extract, and a pinch of sea salt. Stir everything together until it’s nice and smooth. This will be the tasty base for your cups.
2. Line a Muffin Tin:
Grab a muffin tin and either use silicone muffin cups or line the tin with paper cupcake liners. This will help with easy removal later!
3. Create the Chocolate Base:
In a microwave-safe bowl, melt half of the dark chocolate chips in 20-second intervals. Make sure to stir after each interval until the chocolate is fully melted and smooth. This is your delicious chocolate base!
4. Layer the Chocolate:
Spoon a small amount of the melted chocolate into the bottom of each muffin cup, just enough to cover the base. Place the tray in the freezer for about 5 minutes to let the chocolate set firmly.
5. Add the Peanut Butter Layer:
Take the muffin tin out of the freezer and now spoon the smooth peanut butter mixture over the hardened chocolate base. Gently press down to create an even layer.
6. Add a Dollop of Jelly:
Now, place about a teaspoon of your fruit preserves or jelly in the center of each peanut butter layer. This adds that sweet and fruity flavor we love!
7. Top with Remaining Chocolate:
Melt the remaining dark chocolate using the same method as before. Spoon it over the peanut butter and jelly layers to cover each cup fully, creating a lovely chocolate topping.
8. Freeze to Set:
Return the muffin tin to the freezer for at least 30 minutes, or until the cups are fully set and firm to the touch.
9. Serve:
Once set, remove the cups from the freezer and carefully peel off the muffin liners. Sprinkle a little flaky sea salt on top if you’d like, then enjoy immediately! These can also be stored in an airtight container in the fridge or freezer for later.
These Healthy Peanut Butter And Jelly Cups are a fun, nutritious treat that’s perfect for snack time or a sweet craving. Enjoy the delightful balance of creamy, sweet, and slightly salty flavors!
Can I Use Natural Peanut Butter with Crunch?
Absolutely! Crunchy peanut butter can add extra texture to your cups, giving them a delightful bite. Just make sure it’s natural with no added sugar or oils for the healthiest option.
How Can I Store Leftovers?
Store any leftover cups in an airtight container in the refrigerator for up to a week. If you want them to last longer, you can freeze them for up to 3 months. Just let them thaw in the fridge for a bit before enjoying!
Can I Use Milk Chocolate Instead of Dark Chocolate?
Yes, you can use milk chocolate if you prefer a sweeter flavor. Just keep in mind that milk chocolate will contain more sugar compared to dark chocolate. If you love the richness of dark chocolate, consider trying it with at least 70% cocoa for balanced sweetness.
What Can I Use Instead of Coconut Oil?
If you don’t have coconut oil, you can substitute it with melted butter or any neutral oil like canola or grapeseed oil. Just keep in mind that the flavor might slightly change, but it will still work great!