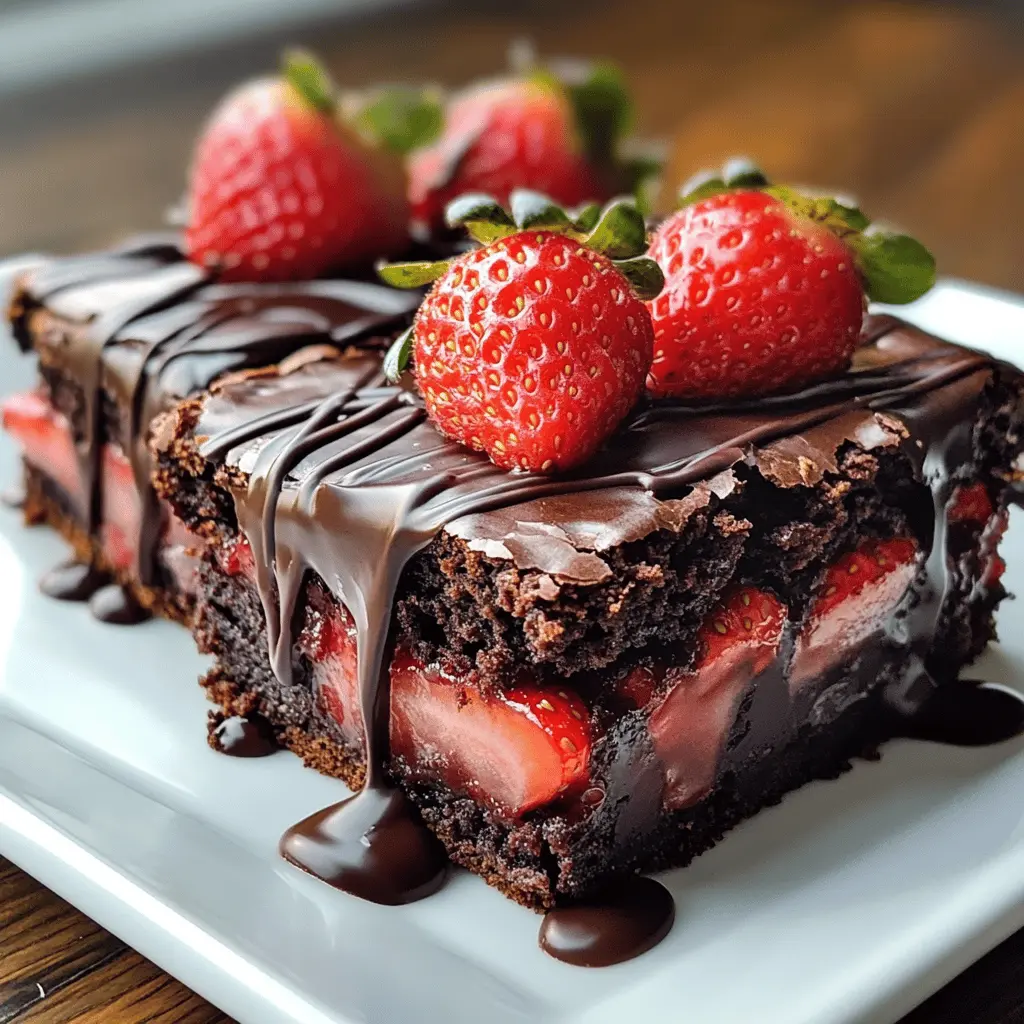
These chocolate-covered strawberry brownies are a sweet treat! They’re fudgy brownies topped with fresh strawberries and drizzled with chocolate—what’s not to love?
Honestly, I can’t resist a good brownie, especially with strawberries on top. I love serving these at parties; they disappear fast! 🍓✨
Key Ingredients & Substitutions
Brownie Mix: Using a box mix is super convenient! If you prefer homemade, go for a classic recipe with cocoa powder for rich flavor. I enjoy a mix of both; sometimes, I tweak a box recipe by adding a bit of extra cocoa powder for depth.
Fresh Strawberries: The best! Make sure they’re ripe for maximum sweetness. If strawberries are out of season, feel free to use raspberries or sliced bananas as substitutes. They both add a lovely fruity contrast!
Chocolate Chips: Semi-sweet or dark chocolate chips work perfectly. If you want to lighten it up, try using milk chocolate or even white chocolate. For a dairy-free version, there are plenty of vegan chocolate chip options available.
Butter or Coconut Oil: Both help make the chocolate drizzle smooth and shiny. I lean towards coconut oil for a hint of tropical flavor that pairs nicely with strawberries! If you’re avoiding fats, you can skip this altogether; just make sure to drizzle gently!
How Do You Bake Brownies to Get Them Just Right?
Baking brownies to that perfect fudginess means paying attention to a few details. First, don’t overmix your batter after adding the eggs; it makes them tough. Also, oven times can vary, so start checking a few minutes before the timer goes off.
- Use an 8×8-inch pan for thick brownies. If you like thinner ones, a 9×13-inch pan works, but adjust baking time.
- When testing with a toothpick, aim for a few moist crumbs. If it comes out clean, they might be overbaked.
- Let them cool completely before cutting. This helps maintain their rich texture and prevents crumbling.
With these tips, you’ll have delicious chocolate-covered strawberry brownies every time! Enjoy baking!
Easy Chocolate Covered Strawberry Brownies
Ingredients You’ll Need:
- 1 box brownie mix (or 1 batch homemade brownie batter)
- Fresh strawberries, about 15–20 medium-sized, washed and hulled
- 1 cup semi-sweet or dark chocolate chips (for melting)
- 1 tablespoon butter or coconut oil (optional, for smoother chocolate drizzle)
How Much Time Will You Need?
This recipe will take around 15 minutes to prepare and about 25-30 minutes to bake. After baking, let the brownies cool for a bit before topping them with chocolate and strawberries. Altogether, you can expect about an hour of total time to enjoy these delicious treats!
Step-by-Step Instructions:
1. Preheat the Oven:
Start by preheating your oven to 350°F (175°C) as per the instructions on your brownie mix or recipe. This ensures that your brownies bake evenly.
2. Prepare the Brownie Batter:
Mix the brownie batter according to the package directions or your homemade recipe. Make sure everything is well combined for the best texture!
3. Layer the Brownie Batter:
Pour half of the brownie batter into a greased or parchment-lined 8×8-inch baking pan. Use a spatula to spread it evenly across the bottom.
4. Add Strawberries:
Carefully arrange the fresh strawberries cut-side down in a single layer over the brownie batter. You can slice them in halves or quarters based on their size, but aim for an even distribution.
5. Top with Remaining Batter:
Gently pour the remaining brownie batter over the strawberries. Make sure to cover them completely so that they’re hidden under the delicious chocolate!
6. Bake the Brownies:
Place the pan into the preheated oven and bake for the time mentioned on the box (usually around 25-30 minutes). Check for doneness by inserting a toothpick near the center; it should come out mostly clean with a few moist crumbs.
7. Cool the Brownies:
Once baked, remove the pan from the oven and let brownies cool completely on a wire rack. This is important to help maintain their fudginess!
8. Melt the Chocolate:
In a microwave-safe bowl, add the chocolate chips and butter (or coconut oil if using). Melt them in the microwave in 20-second intervals, stirring after each one until the mixture is smooth and glossy.
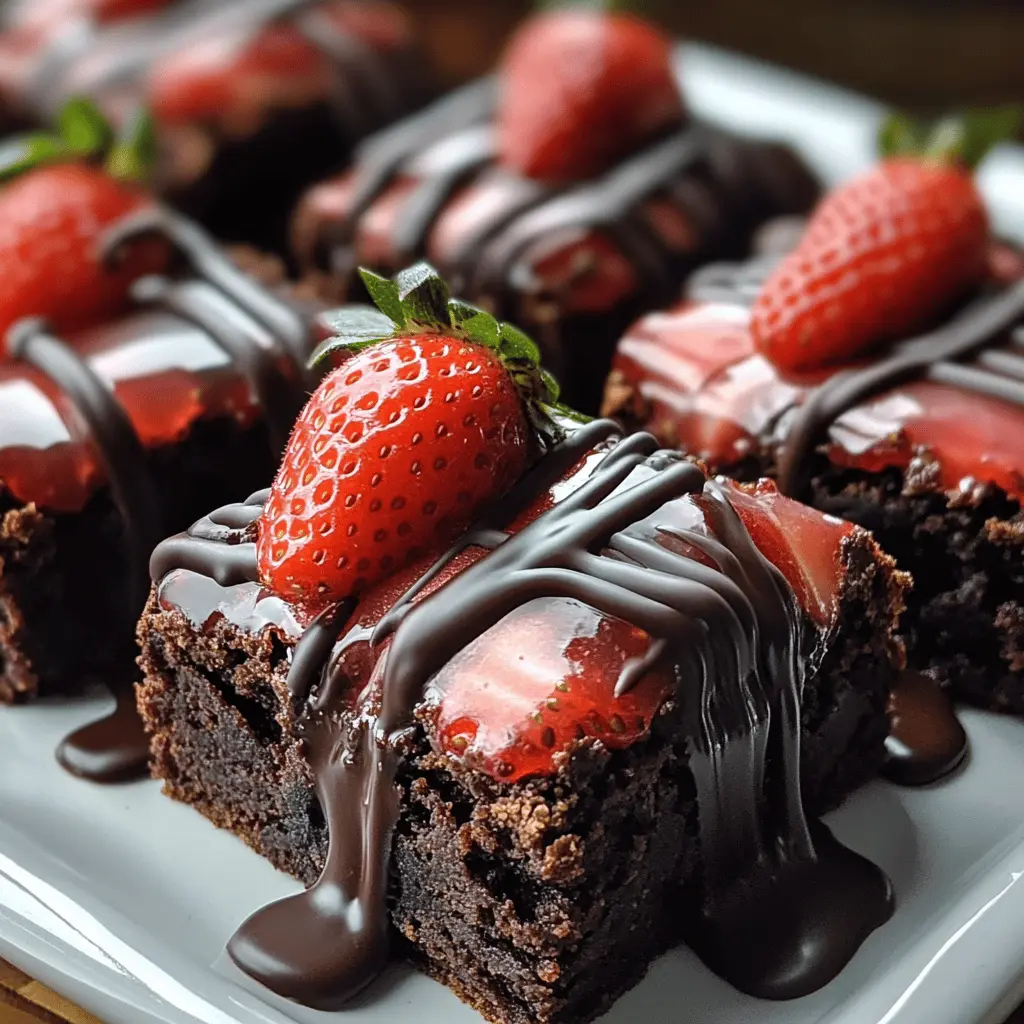
9. Drizzle the Chocolate:
Using a spoon or a fork, drizzle the melted chocolate evenly over the cooled brownies, taking your time to create a beautiful pattern!
10. Cut and Top:
Carefully cut the brownies into squares. To make them look extra special, top each piece with a fresh strawberry half.
11. Serve and Enjoy!
Your rich, fudgy chocolate-covered strawberry brownies are ready to be enjoyed! Serve them at your next gathering or keep them all to yourself—they’re that good!
This recipe is a delightful way to combine the flavors of chocolate and strawberry, offering a sweet treat that everyone will adore.
FAQ for Easy Chocolate Covered Strawberry Brownies
Can I Use a Different Type of Fruit?
Absolutely! While strawberries are delicious, you can substitute them with raspberries, blueberries, or even banana slices. Just keep in mind that the baking time may vary slightly depending on the moisture content of the fruit.
How Can I Store Leftover Brownies?
Store any leftover brownies in an airtight container at room temperature for up to 3 days. If you want to keep them longer, refrigerate them for up to a week—or freeze them for up to 3 months! Just thaw in the fridge before serving.
Can I Make This Recipe Gluten-Free?
Yes! Simply use a gluten-free brownie mix or substitute the flour in your homemade brownie recipe with a gluten-free blend. Just be cautious about cross-contamination if you’re cooking for someone with gluten sensitivities.
What Should I Pair These Brownies With?
These brownies pair wonderfully with a scoop of vanilla ice cream or whipped cream for an indulgent dessert! You can also serve them with a drizzle of chocolate syrup or a sprinkle of powdered sugar for added flair.