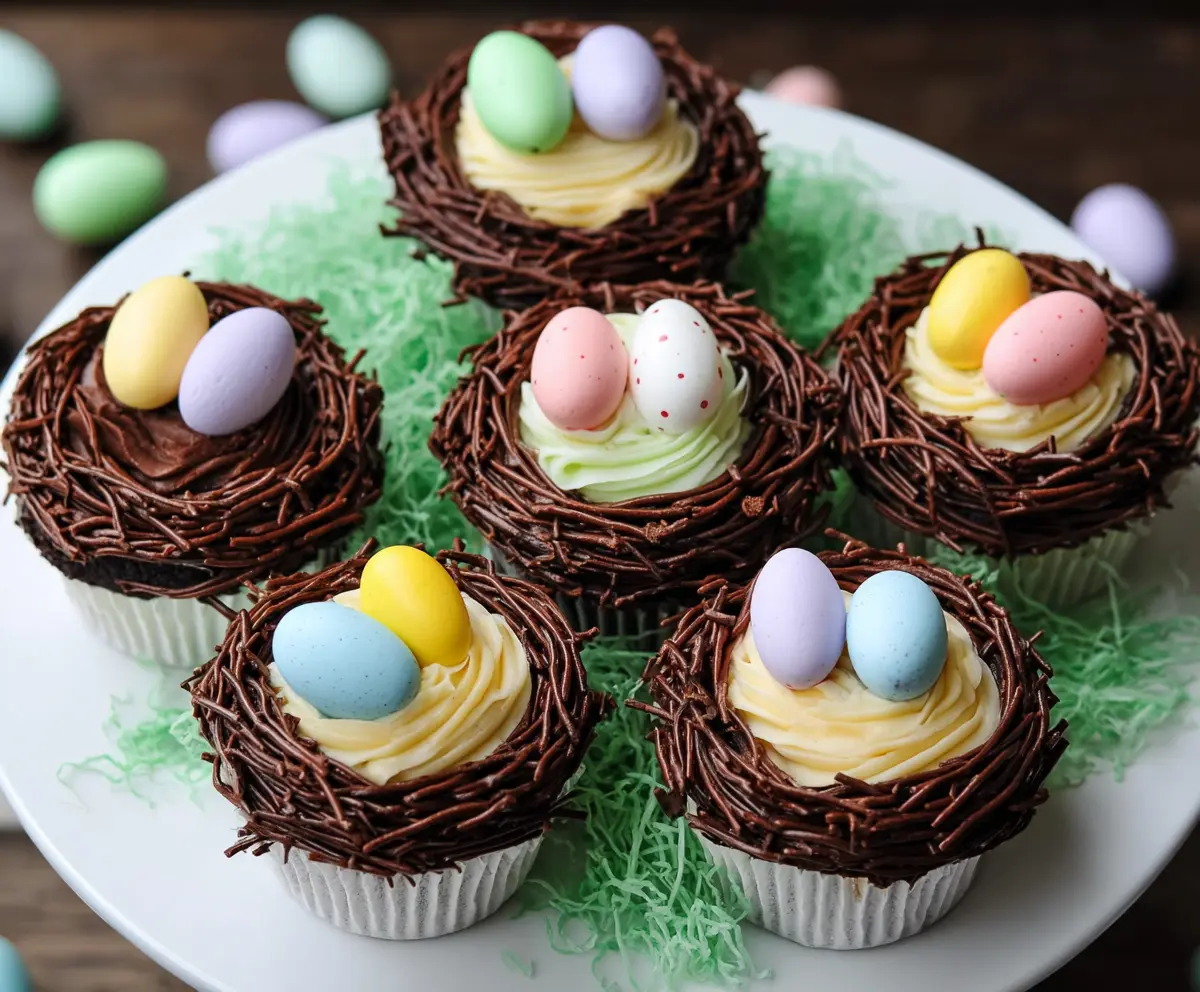
These colorful Easter Egg Nest Cupcakes are perfect for spring celebrations! Each cupcake is topped with fluffy frosting and a nest made of crispy noodles, holding sweet chocolate eggs.
Kids love helping make these fun treats, and I can’t resist sneaking an extra egg (or two)! They’re as delicious as they are cute, making them a hit at any Easter gathering!
Key Ingredients & Substitutions
Cocoa Powder: Use unsweetened cocoa powder for that rich chocolate flavor. If you need a substitution, you can use Dutch-processed cocoa for a smoother taste, but it may slightly alter the final color.
Whole Milk: For a lighter cupcake, feel free to substitute with 2% or almond milk. Just keep in mind that the texture may be slightly different.
Butter: Unsalted butter gives more control over the sweetness. If you’re dairy-free, try using vegan butter or margarine in the frosting instead!
Chocolate Sprinkles: Semi-sweet chocolate sprinkles work best, but you can use regular chocolate chips or colored sprinkles if that’s all you have at home.
How Do I Get Light and Fluffy Buttercream Frosting?
Good buttercream can make or break a cupcake! Start with softened butter for easy mixing. Gradually add the powdered sugar to avoid a cloud of sugar, mixing thoroughly after each addition.
- Beat the butter for at least 5 minutes until it’s really creamy.
- For that light, airy texture, make sure your frosting is whipped well. You can add extra cream or milk if it’s too thick, but do it slowly!
What’s the Best Way to Make Chocolate Nests?
These nests are a fun touch! When combining chocolate sprinkles with melted chocolate, ensure they’re completely coated for the best texture. Shape them carefully on parchment to hold their form.
- Use a spoon or your fingers to mold small circles and create little indentations in the middle.
- Chill them until firm; this helps them maintain shape when placed on the cupcakes.
How to Make Easter Egg Nest Cupcakes
Ingredients You’ll Need:
For The Cupcakes:
- 1 ¾ cups all-purpose flour
- 1 cup granulated sugar
- ¾ cup unsweetened cocoa powder
- 1 ½ tsp baking powder
- 1 ½ tsp baking soda
- 1 tsp salt
- 2 large eggs
- 1 cup whole milk
- ½ cup vegetable oil
- 2 tsp vanilla extract
- 1 cup boiling water
For The Buttercream Frosting:
- 1 cup unsalted butter, softened
- 3-4 cups powdered sugar, sifted
- 1-2 tbsp heavy cream or milk
- 1 tsp vanilla extract
- Pinch of salt
For The Chocolate Nest:
- 1 ½ cups semi-sweet chocolate sprinkles (or chocolate jimmies)
- ½ cup melted chocolate (semi-sweet or dark)
For Decoration:
- Candy-coated chocolate Easter eggs (pastel colors, assorted)
Optional:
- Green shredded coconut or green edible grass for presentation on serving plate
How Much Time Will You Need?
This recipe will take about 45-60 minutes to prepare, bake, and assemble. Allow about 20-30 minutes for the cupcakes to cool completely before frosting, and a little chill time for the nests. You’ll have a delicious Easter treat in no time!
Step-by-Step Instructions:
1. Prepare the Cupcakes:
First, let’s get the oven ready! Preheat it to 350°F (175°C) and line a cupcake pan with paper liners. In a large mixing bowl, sift together the flour, sugar, cocoa powder, baking powder, baking soda, and salt. Then, add the eggs, milk, vegetable oil, and vanilla extract, mixing everything until it’s well combined. Carefully stir in the boiling water—your batter will be thin, and that’s okay! Pour the batter evenly into the cupcake liners, filling each about 2/3 full. Bake them for 18-22 minutes, or until a toothpick comes out clean when inserted in the center. Once they’re done, take them out and let them cool completely on a wire rack.
2. Make the Buttercream Frosting:
Next up, let’s make that tasty frosting! In a large bowl, beat the softened butter with a mixer until it’s creamy. Gradually add the sifted powdered sugar, one cup at a time, making sure to beat well after each addition. Once all the sugar is in, add in the vanilla extract, salt, and 1 tablespoon of cream or milk. Beat everything together until it’s light and fluffy. If your frosting feels too thick, just add more cream or milk, one teaspoon at a time, until you reach the desired consistency.
3. Create the Chocolate Nests:
Now, let’s get a little creative! Combine the chocolate sprinkles with the melted chocolate in a bowl, mixing until all the sprinkles are evenly coated. On some parchment paper, shape small circles, about the size of a cupcake top, to form “nests.” Use a spoon or fork to create a nest shape with a small indentation in the center. Pop these chocolate nests in the refrigerator for about 15-20 minutes until they harden up nicely.
4. Assemble the Cupcakes:
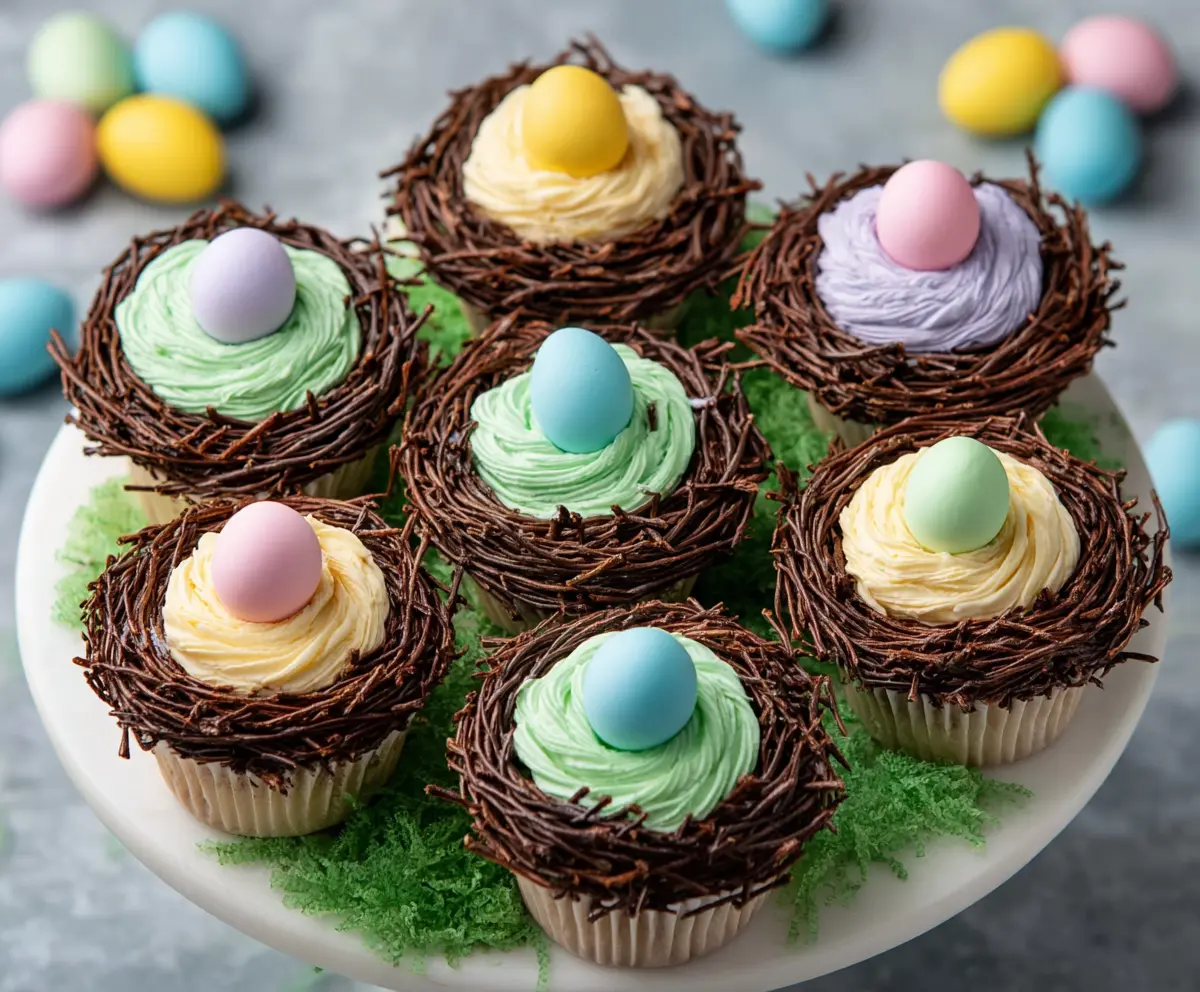
It’s time to bring it all together! Using a piping bag fitted with a star tip, pipe a lovely swirl of buttercream frosting onto each cooled cupcake. Carefully place one chocolate nest right on top of each buttercream swirl, and then decorate each nest with two candy-coated eggs nestled in the center.
5. Presentation:
For a festive touch, you can lay down green shredded coconut or green edible grass on a serving plate to look like grass. Arrange your beautifully decorated cupcakes on the plate, and voilà! Your Easter display is ready to impress!
6. Serve and Enjoy!
These delightful Easter Egg Nest Cupcakes are perfect for celebrating springtime! They feature moist chocolate cupcakes topped with creamy vanilla buttercream, chocolate sprinkle nests, and pastel candy eggs. Enjoy every bite!
Can I Use Different Types of Flour?
While all-purpose flour is recommended for best results, you can substitute with cake flour for a lighter texture. Just remember to keep an eye on the baking time, as it may vary slightly.
What If I Don’t Have Semi-Sweet Chocolate Sprinkles?
No worries at all! You can use regular chocolate chips or colored sprinkles instead. If using chips, you’ll miss out on the nest texture, but they’ll still look great!
How Do I Store Leftover Cupcakes?
Store any leftovers in an airtight container at room temperature for up to 3 days. If you want them to last longer, refrigerate for up to a week. Just bring them back to room temperature before serving for best flavor!
Can I Make These Cupcakes Gluten-Free?
Yes, you can! Substitute the all-purpose flour with a 1:1 gluten-free baking blend. Be sure to check that your baking powder and cocoa powder are gluten-free as well.