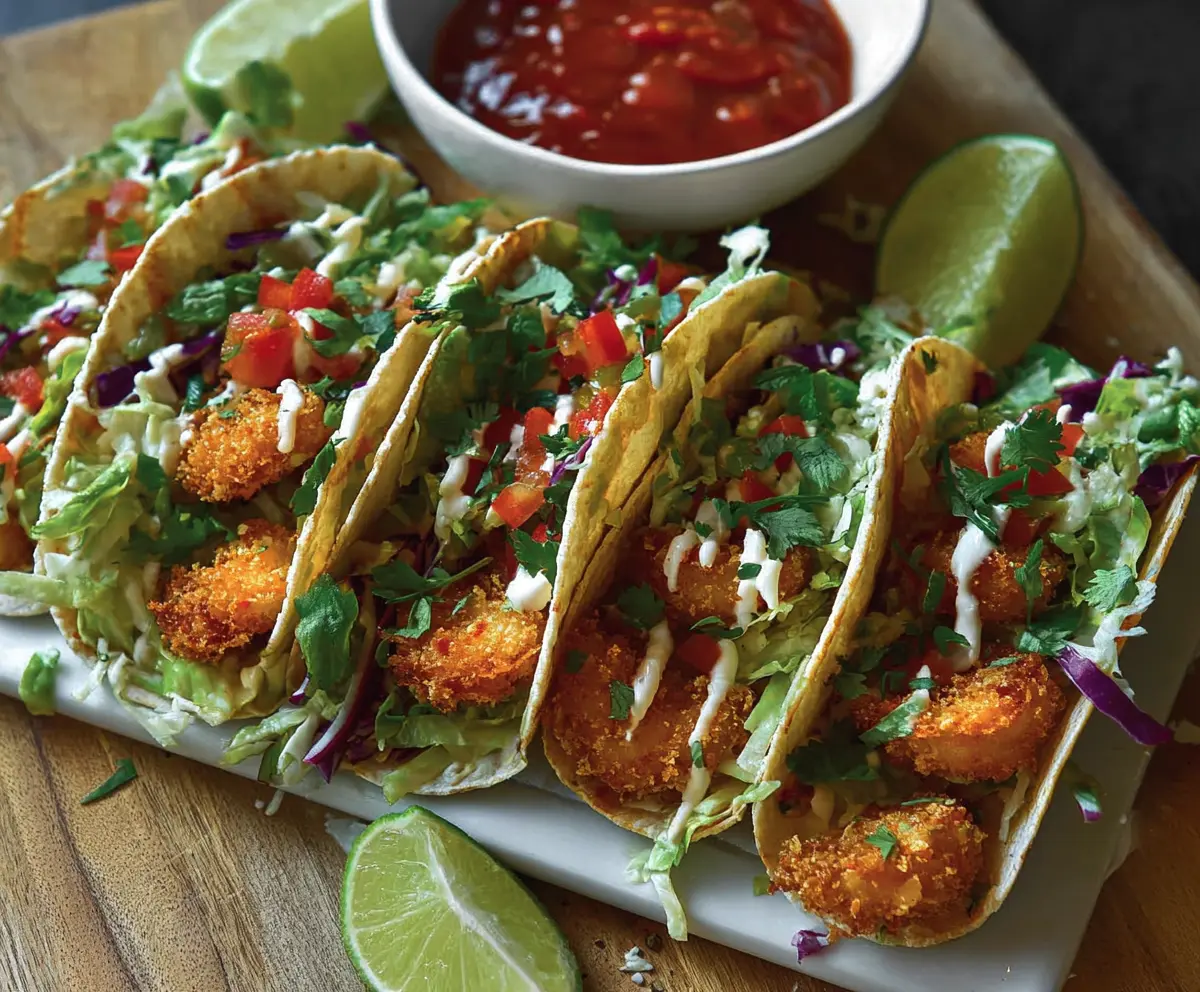
These crispy coconut shrimp tacos are a fun twist on taco night! The shrimp is coated in crunchy coconut that gives a yummy sweetness and is perfectly paired with fresh toppings.
Can we agree that biting into these tacos feels like a mini-vacation? I love piling on avocado and salsa for extra zing. They’re easy to make and even easier to enjoy!
Key Ingredients & Substitutions
Shrimp: Look for large or extra-large shrimp for the best bite. Fresh shrimp is great, but frozen works too—just ensure it’s fully thawed before cooking. If you’re not a seafood fan, try chicken tenders instead!
Coconut: Shredded coconut adds sweetness and crunch. Unsweetened coconut gives a nuttier taste. If you’re not a coconut lover, you can use crushed corn flakes or breadcrumbs for a similar crunch.
Panko Breadcrumbs: These light breadcrumbs help achieve crispiness. If you don’t have panko, regular breadcrumbs can work, but the texture won’t be as airy. Gluten-free breadcrumbs or crushed nuts can be fun alternatives too!
Tortillas: Corn tortillas are traditional and tasty, but flour tortillas can also be used if you prefer a softer bite. Just warm them up for about 30 seconds in a pan for best results.
How Do You Get the Perfect Crispy Shrimp?
Getting that crispy coating on the shrimp is all about the breading process! Start by preparing your breading station with flour, beaten eggs, and your coconut-panko mix. Follow these steps for success:
- Make sure the shrimp is dry before seasoning to help the coating stick.
- Dip each shrimp into flour, coat it well, then shake off the excess. This step helps the egg stick better.
- Coat the shrimp in egg, letting the excess drip off, then roll it in the coconut-panko mixture. Press gently to ensure it adheres well.
- Fry at the right temperature—around 350°F. This ensures that the shrimp cooks through while the coating crisps up nicely. If the oil isn’t hot enough, you’ll end up with soggy shrimp.
Following these tips will help you achieve that crunchy exterior that everyone loves!
How to Make Crispy Coconut Shrimp Tacos
Ingredients You’ll Need:
- For the Shrimp:
- 1 lb large shrimp, peeled and deveined
- 1/2 cup all-purpose flour
- 2 large eggs
- 1 cup shredded coconut (sweetened or unsweetened, depending on preference)
- 1 cup panko breadcrumbs
- 1 tsp smoked paprika
- 1/2 tsp garlic powder
- Salt and pepper to taste
- Vegetable oil, for frying
- For the Tacos:
- 8 small corn tortillas
- 1 cup shredded lettuce (iceberg or green leaf)
- 1/2 cup shredded purple cabbage
- 1/2 cup diced tomatoes
- 1/4 cup fresh cilantro, chopped
- 1/2 cup sour cream or Mexican crema
- 1 lime, cut into wedges
- Optional: salsa or hot sauce for serving
How Much Time Will You Need?
This recipe takes about 30 minutes from start to finish. You’ll spend around 15 minutes prepping the ingredients and breading the shrimp, and another 15 minutes frying the shrimp and assembling the tacos. Perfect for a quick weeknight dinner or casual get-together!
Step-by-Step Instructions:
1. Prepare the Shrimp:
Start by patting the shrimp dry with paper towels to ensure a good sear. Season them lightly with salt and pepper for added flavor.
2. Set Up Your Breading Station:
You’ll need three shallow bowls to make breading easy. In the first bowl, add the flour. In the second bowl, beat the eggs until fully mixed. In the third bowl, combine the shredded coconut, panko breadcrumbs, smoked paprika, garlic powder, salt, and pepper. This will be your crispy coating!
3. Bread the Shrimp:
Take each shrimp and dip it into the flour, shaking off any excess. Then, coat it in the beaten eggs, letting the extra drip off. Finally, roll the shrimp into the coconut-panko mixture, pressing lightly to help it stick. Place the breaded shrimp on a plate.
4. Heat the Oil:
In a large skillet, heat about 1/2 inch of vegetable oil over medium-high heat until it’s hot but not smoking (around 350°F or 175°C). You can test the oil by dropping in a small piece of the batter; if it sizzles, you’re ready to fry!
5. Fry the Shrimp:
Add the breaded shrimp to the hot oil in batches. Fry for about 2-3 minutes per side, or until golden brown and crispy. Use a slotted spoon to transfer the cooked shrimp to a plate lined with paper towels to drain any excess oil.
6. Warm the Tortillas:
To make the tortillas pliable, warm them up in a dry skillet over medium heat or microwave them for about 30 seconds.
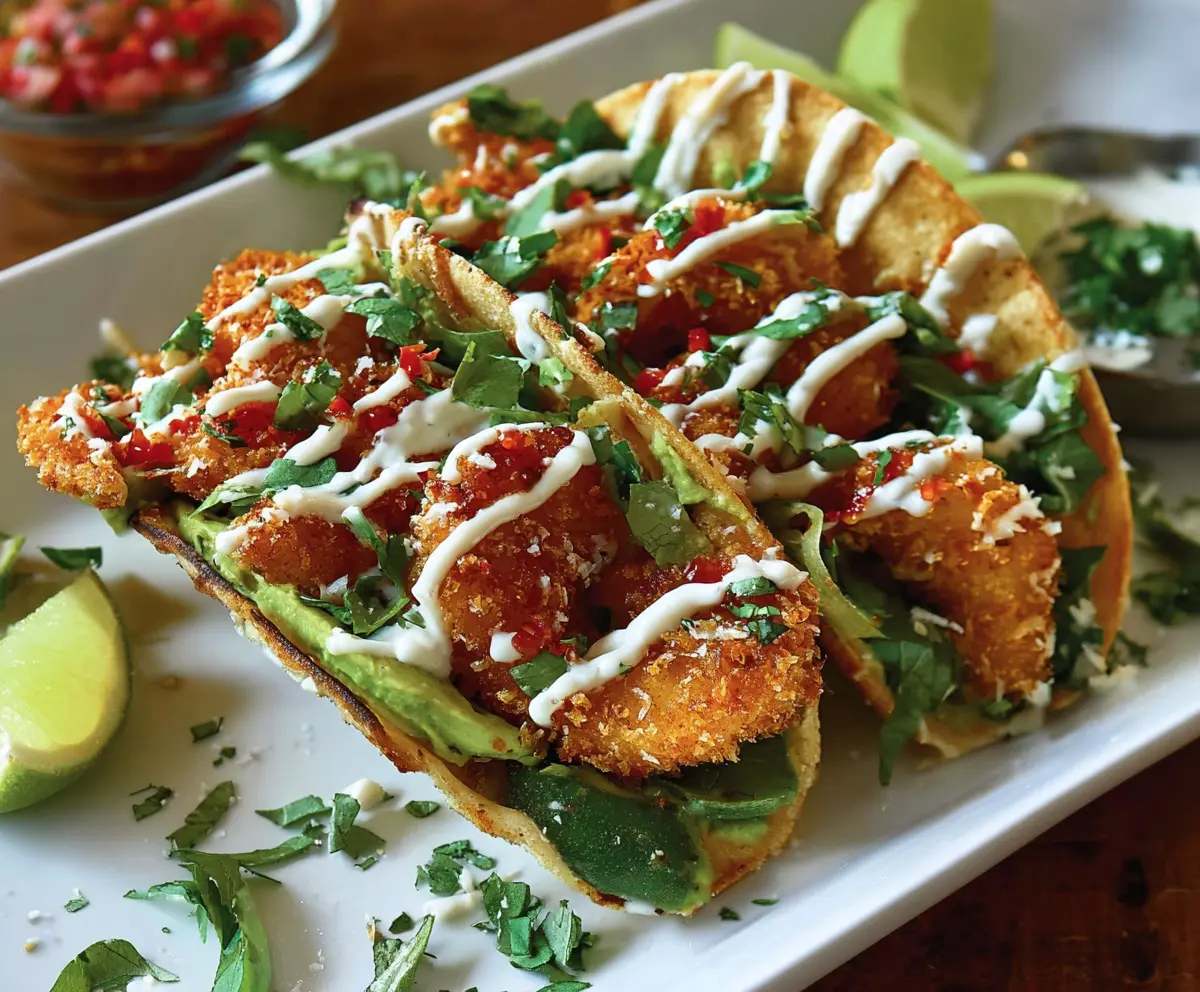
7. Assemble the Tacos:
Start building your tacos! Place a layer of shredded lettuce and purple cabbage on each corn tortilla. Add 3-4 crispy coconut shrimp on top.
8. Add the Toppings:
Top the shrimp with diced tomatoes, chopped cilantro, and a drizzle of sour cream or crema for extra creaminess.
9. Serve and Enjoy:
Serve the tacos with lime wedges on the side for an added burst of flavor. You can also include optional salsa or hot sauce if you like a little kick.
10. Finishing Touch:
Just before enjoying, squeeze some lime juice over your tacos for that refreshing zing!
Enjoy these crispy coconut shrimp tacos with fresh, crunchy toppings and a zesty lime kick! They’re sure to be a hit with family and friends.
Can I Use Frozen Shrimp for This Recipe?
Yes, you can definitely use frozen shrimp! Just make sure to thaw them completely in the fridge overnight or quickly under cold running water. Pat them dry before seasoning to ensure the coating sticks well.
What Can I Substitute for Panko Breadcrumbs?
If you don’t have panko, regular breadcrumbs can work, but the shrimp won’t be as crispy. You could also use crushed corn flakes or even crushed nuts like almonds for a different texture and flavor!
How Do I Store Leftover Tacos?
Store any leftover shrimp in an airtight container in the fridge for up to 2 days. Keep the assembled tacos separate to avoid sogginess. Reheat the shrimp in the oven at 350°F until they’re warmed through and crispy again before reassembling the tacos.
Can I Make These Tacos Ahead of Time?
While it’s best to enjoy them fresh, you can prepare the shrimp and toppings in advance! Bread the shrimp and refrigerate them for up to 1 hour before frying. You can also prepare the toppings ahead and store them in the fridge until you’re ready to assemble.