These corned beef and cheese balls are a tasty treat! They’re packed with savory corned beef and creamy cheese, making them perfect for snacking or parties.
I love how easy they are to whip up. Just mix, form into balls, and bake! They disappear quickly at gatherings, so maybe make a double batch—you know, just in case! 😄
Key Ingredients & Substitutions
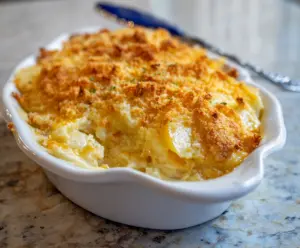
Mashed Potatoes: These are the base for your cheese balls. If you’re short on time, you can use store-bought mashed potatoes, or even sweet potatoes for a twist. I often use leftover mashed potatoes for an easy solution!
Corned Beef: Use leftover corned beef or even deli cuts. If you prefer a vegetarian option, try finely chopped mushrooms or tempeh seasoned with a bit of soy sauce for a similar umami kick.
Cheddar Cheese: The classic choice here. You can use any melting cheese like Monterey Jack or Gouda, or even a spicy pepper jack for a kick! For a dairy-free version, try vegan cheese shreds.
Onions: While optional, onions add depth. If you don’t want to use regular onions, try using shallots or skip them entirely for a smoother texture.
Breadcrumbs: Panko gives a wonderful crunch, but any breadcrumbs work. For a gluten-free version, use crushed rice cereal or gluten-free breadcrumbs.
How Do I Shape and Fry the Cheese Balls Properly?
Shaping your cheese balls correctly helps them hold together while frying. Here’s how to do it right:
- Start with a wet hand if the mixture is sticky. This makes it easier to form balls.
- Make sure to seal the cheese in well by reshaping after stuffing it; otherwise, it might ooze out while frying.
- When frying, keep the oil hot but not smoking. If it’s too cool, your cheese balls may absorb more oil and not get crispy.
- Fry in small batches to avoid overcrowding, which can drop the oil temperature. Keep a close eye on them; they cook quickly!
Following these tips ensures your cheese balls turn out crispy and delicious every time!

How to Make Corned Beef and Cheese Balls
Ingredients You’ll Need:
For the Cheese Balls:
- 2 cups cooked mashed potatoes
- 1 cup cooked corned beef, finely chopped or shredded
- 1 cup shredded cheddar cheese (plus extra for stuffing)
- 1/4 cup finely chopped onions (optional)
- 2 green onions, finely chopped (for garnish and optional mix-in)
- 1 tsp garlic powder
- 1 tsp ground black pepper
- 1 tsp smoked paprika (optional)
- Salt to taste
- 1 cup all-purpose flour
- 2 large eggs, beaten
- 1 cup breadcrumbs (panko or regular)
- Oil for frying
How Much Time Will You Need?
This recipe takes about 30 minutes to prepare and an additional 10-15 minutes for frying, so in total, you’re looking at approximately 45 minutes to have these delicious Corned Beef and Cheese Balls ready to serve. Perfect for an appetizer or snack!
Step-by-Step Instructions:
1. Prepare the Mixture:
In a large mixing bowl, combine the cooked mashed potatoes, finely chopped corned beef, shredded cheddar cheese, and chopped onions if you’re using them. Add the garlic powder, black pepper, smoked paprika (if desired), and a pinch of salt. Mix everything together thoroughly until well combined. This is the delicious filling for your cheese balls!
2. Shape the Cheese Balls:
Take a small handful of the mixture and shape it into a ball, about the size of a golf ball. To add a cheesy surprise, press a small cube of cheddar cheese into the center of each ball, ensuring the mixture fully encloses the cheese. Reroll the ball to make sure it’s sealed tight. Repeat this for the remaining mixture until all the cheese balls are formed.
3. Set Up Your Dredging Station:
Create a dredging station by placing flour in one bowl, the beaten eggs in another bowl, and the breadcrumbs in a third bowl. This is key for getting a crispy coating on your cheese balls!
4. Coat the Cheese Balls:
Roll each ball into the flour first, shaking off any excess. Then, dip it into the beaten eggs and finally coat it thoroughly with breadcrumbs. This will give them a nice crispy texture when fried. Make sure every ball is well coated!
5. Frying the Cheese Balls:
Heat oil in a deep fryer or a deep skillet over medium heat until it reaches around 350°F (175°C). Fry the cheese balls in batches, carefully placing them in the hot oil. Cook for about 3-4 minutes, or until they are golden brown and crispy all over. Avoid overcrowding the pan to keep the oil temperature consistent.
6. Drain and Serve:
Once fried, remove the balls using a slotted spoon and place them on paper towels to drain excess oil. For a fun presentation, arrange the cheese balls on a serving plate alongside a scoop of creamy corned beef and cheese dip (simply mix softened cream cheese with more finely chopped corned beef and a little seasoning!).
7. Garnish and Enjoy:
Don’t forget to garnish your dip with some chopped green onions for that fresh touch. Serve the cheese balls warm as a delightful appetizer or snack. Enjoy your crispy, cheesy Corned Beef and Cheese Balls!
Can I Use Leftover Corned Beef for This Recipe?
Absolutely! Leftover corned beef works perfectly in this recipe. Just ensure it is finely chopped or shredded so it combines well with the other ingredients. It’s a great way to use up leftovers!
How Do I Store Leftover Cheese Balls?
Store any leftover cheese balls in an airtight container in the refrigerator for up to 3 days. To reheat, place them in an oven at 350°F (175°C) for about 10 minutes for that crispy texture again, or microwave them for a quick fix (though they may lose some crunch).
Can I Make These Cheese Balls Ahead of Time?
Yes! You can prepare the cheese balls in advance and keep them in the refrigerator before frying. Just pop them in the fridge for up to 24 hours. When you’re ready to serve, fry them straight from the fridge for the best results!
What Can I Use Instead of Breadcrumbs?
If you’re out of breadcrumbs, you can use crushed crackers, cornmeal, or even finely crushed rice cereal for a gluten-free option. Just ensure whatever you choose can create a nice, crispy outer layer when fried.