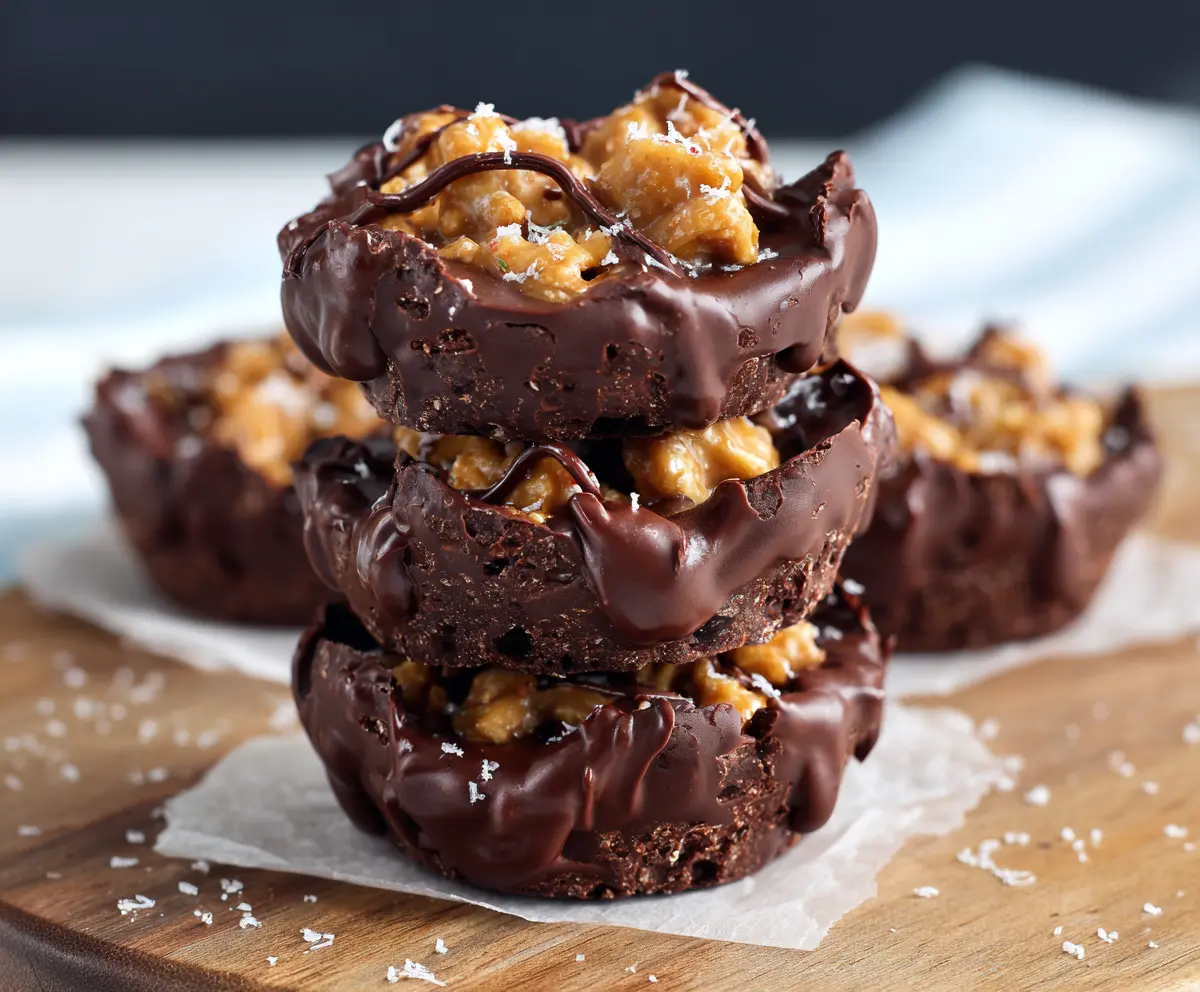
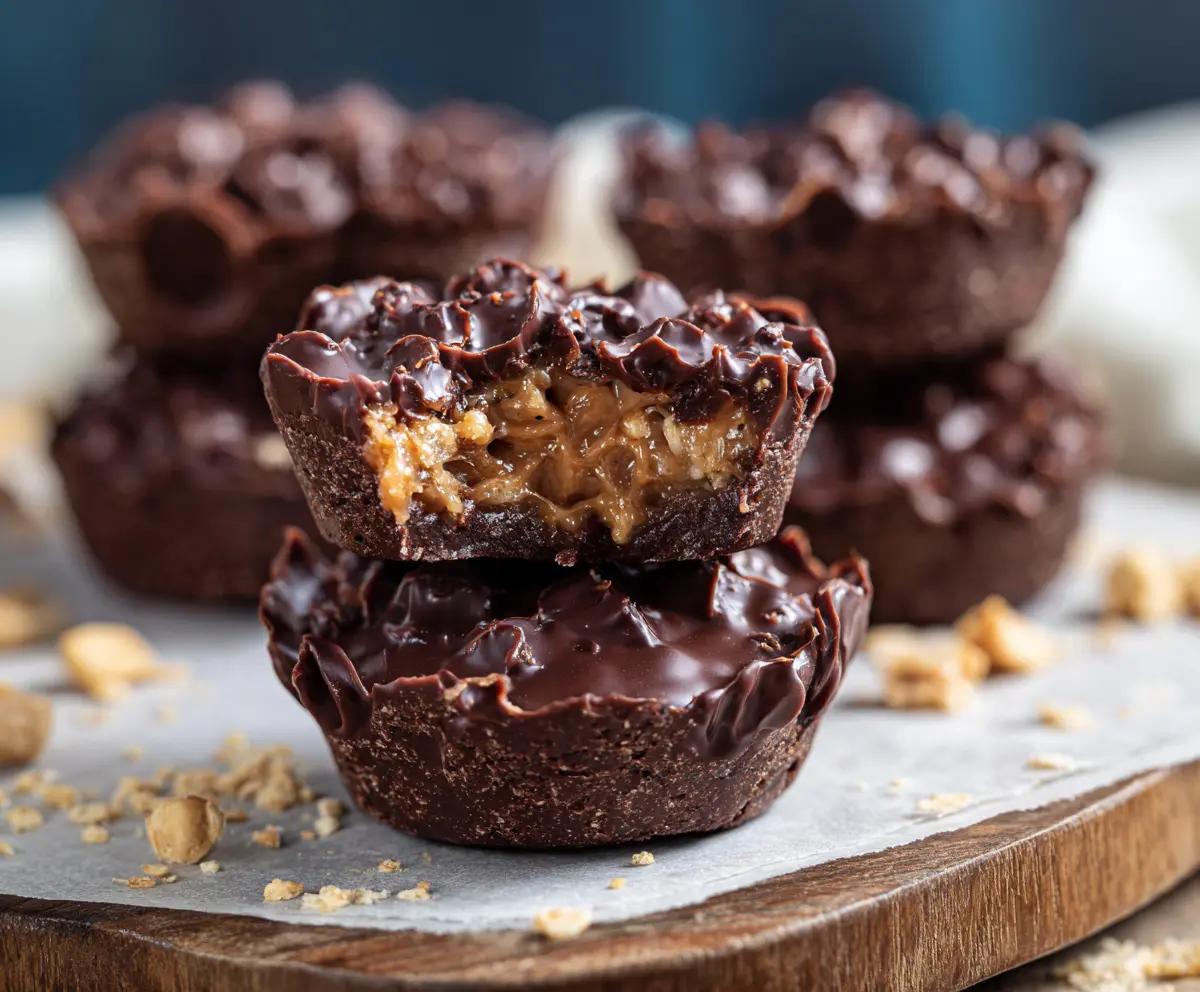
These Chocolate Peanut Butter Crunch Cups are a sweet treat that everyone loves! With creamy peanut butter inside and a crunchy outer shell, they are pure happiness in every bite.
Making them is fun—just mix, pour, and chill! They’re perfect for sharing, though I might keep a few for myself. Who can resist that combo of chocolate and peanut butter? 😋
Key Ingredients & Substitutions
Chocolate Chips: Use semi-sweet or dark chocolate chips for a rich flavor. If you’re a fan of milk chocolate or need it sweeter, feel free to substitute. I often mix dark and milk chocolates for a balance of flavors.
Crispy Rice Cereal: This gives the crunch factor! If you can’t find it, try using puffed wheat or corn cereal instead. I’ve even used crushed granola for a different texture and taste.
Peanut Butter: Go for crunchy peanut butter if you love that textural contrast. If allergies are a concern, almond or sunflower seed butter can be a great substitute.
Butter: Unsalted butter adds richness. If you’re dairy-free, coconut oil works wonderfully here, too!
Sweetener: Honey or maple syrup provides sweetness. For a vegan option, sticking with maple syrup is best. You could also use agave nectar if that’s what you have.
How Do I Make Sure My Chocolate Melts Smoothly?
Melting chocolate can be tricky, but with a few tricks, it can be easy. Here’s what to remember:
- Use a microwave-safe bowl to melt the chocolate in short bursts—about 30 seconds at a time, stirring in between. This helps prevent overheating.
- Make sure the bowl is completely dry. Any water can cause the chocolate to seize up, making it grainy.
- If you prefer a stovetop method, use a double boiler to melt chocolate gently over simmering water.
- Stir continuously as it melts to encourage even melting.
With these tips, you’ll have a smooth, deliciously glossy chocolate ready for your crunch cups!
How to Make Chocolate Peanut Butter Crunch Cups
Ingredients You’ll Need:
- 1 1/2 cups semi-sweet or dark chocolate chips
- 1/2 cup crunchy peanut butter
- 2 tbsp unsalted butter
- 2 tbsp honey or maple syrup
- 1 cup crispy rice cereal or rice krispies
- 1/4 tsp sea salt, plus extra for garnish
- Optional: 1 tsp vanilla extract
How Much Time Will You Need?
Preparing these delicious cups will take you about 15-20 minutes. After that, you’ll need to chill them in the freezer for about 30-40 minutes for a perfect set. So, you’re looking at around 1 hour total before you can enjoy these tasty treats!
Step-by-Step Instructions:
1. Prepare the Muffin Tin:
Start by lining a muffin tin with paper cupcake liners. If you don’t have liners, you can lightly grease the tin with a bit of cooking spray or oil. This step is essential, so the cups release easily after setting.
2. Melt the Chocolate:
In a microwave-safe bowl, combine the chocolate chips and butter. Microwave the mixture in 30-second intervals, stirring well between each until the chocolate is completely melted and smooth. Be careful not to overheat!
3. Mix with Rice Cereal:
Once your chocolate is melted, add half of the melted chocolate to the crispy rice cereal. Stir gently until the cereal is evenly coated. This will be your crunchy cup shell!
4. Form the Cup Shells:
Spoon the chocolate-coated cereal mixture into your muffin cups, pressing gently to create an even layer. Make sure the base is solid enough to hold the filling. Pop the tin in the freezer to set for about 10 minutes.
5. Prepare the Peanut Butter Filling:
While the first layer is setting, mix together the crunchy peanut butter, honey (or maple syrup), sea salt, and optional vanilla extract in a medium bowl until well combined. This will create a delicious creamy filling!
6. Fill the Cups:
After 10 minutes, take the muffin tin out of the freezer. Spoon the peanut butter mixture on top of each chocolate-covered base, filling them about 3/4 full. Don’t worry if it’s a little messy; it’ll be delicious!
7. Drizzle the Remaining Chocolate:
Use the remaining melted chocolate to drizzle over the peanut butter filling. Let it drip down the sides for that lovely presentation. It adds to the indulgent look!
8. Add a Touch of Sea Salt:
Sprinkle a tiny pinch of sea salt on top of each cup for that perfect sweet-and-salty flavor contrast. It really enhances the taste!
9. Chill to Set:
Put the muffin tin back in the freezer and chill for at least 30 minutes, or until the cups are fully firm and set. You want that satisfying crunch when you take a bite.
10. Serve and Enjoy:
Once they’re set, carefully remove the cups from the muffin tin and peel off the liners. You can enjoy them chilled or at room temperature. Either way, they’re a treat you won’t want to miss!
Enjoy your rich, crunchy, sweet, and salty Chocolate Peanut Butter Crunch Cups!
Can I Use Milk Chocolate Instead of Semi-Sweet or Dark Chocolate?
Absolutely! Milk chocolate will give your Crunch Cups a sweeter flavor. Just be sure to adjust the sweetness of the peanut butter filling if you prefer a less sugary taste.
How Should I Store Leftovers?
Store any leftovers in an airtight container in the refrigerator for up to one week. If you want to keep them for longer, you can freeze them for up to three months. Just make sure to thaw them in the fridge before enjoying!
Can I Make Them Gluten-Free?
Yes, if you use certified gluten-free crispy rice cereal, these cups can easily be made gluten-free. Just double-check that all of your ingredients are gluten-free as well.
What Can I Substitute for Peanut Butter?
If you need a substitute, you can use almond butter, cashew butter, or sunflower seed butter for a nut-free version. Each will bring a unique flavor, so choose based on your preference or dietary needs!