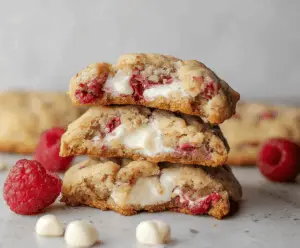
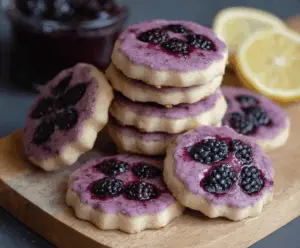
These Christmas sugar cookies are as sweet as the holiday spirit! Soft, buttery, and topped with colorful sprinkles, they make every celebration a little brighter.
Baking these cookies is so much fun; I love decorating them with my family! Just don’t eat all the sprinkles before they make it to the cookies! 😂
They are super easy to whip up, and the smell of cookies filling the kitchen is the best part of the holidays for me. Plus, they’re perfect for sharing with friends and family!
Key Ingredients & Substitutions
All-Purpose Flour: This forms the base of our cookies. For a gluten-free version, try using a 1:1 gluten-free flour blend. Just make sure it contains xanthan gum for better texture!
Unsalted Butter: Soften the butter for creaminess. If you need a dairy-free option, coconut oil or a dairy-free butter substitute works great too.
Sugar: Granulated sugar gives sweetness and helps with texture. For a richer flavor, substitute half with brown sugar. You could even use coconut sugar for a healthier twist.
Extracts: Vanilla is essential, but almond adds a delightful twist. Feel free to swap with peppermint or lemon extract for an extra holiday flair!
How Do You Make Perfect Royal Icing?
Royal icing is key for decorating your cookies but can seem tricky at first. The right consistency is everything! Here’s how to nail it:
- Mix powdered sugar and meringue powder in a bowl.
- Gradually add warm water while mixing until you reach stiff peaks — it should hold its shape.
- If it’s too thick, add a bit more water; if too runny, add more powdered sugar.
- For flooding (filling cookie designs), thin out some icing with a bit more water until it flows smoothly.
Let your decorated cookies dry completely at room temperature to avoid sticking together when you stack them! Happy decorating!

Christmas Sugar Cookies
Ingredients:
- For the Cookie Dough:
- 3 cups all-purpose flour
- 1 teaspoon baking powder
- 1/2 teaspoon salt
- 1 cup unsalted butter, softened
- 1 cup granulated sugar
- 1 large egg
- 1 teaspoon vanilla extract
- 1/2 teaspoon almond extract (optional)
- For the Royal Icing:
- 4 cups powdered sugar, sifted
- 3 tablespoons meringue powder
- 9-10 tablespoons warm water
- Food coloring as desired
How Much Time Will You Need?
This delicious Christmas sugar cookie recipe will take about 20 minutes of prep time and 1 hour of chill time for the dough, plus 10-15 minutes of baking time. You’ll also want to set aside extra time for decorating the cookies, so plan for about 2-3 hours in total, including drying time for the royal icing!
Step-by-Step Instructions:
1. Make the Cookie Dough:
In a medium bowl, whisk together the flour, baking powder, and salt. Set this mix aside for now. In a large bowl, use an electric mixer on medium speed to beat the softened butter and granulated sugar together until it becomes light and fluffy—this usually takes about 3-4 minutes. Next, add the egg, vanilla extract, and almond extract (if using), mixing until just combined.
2. Combine Dry and Wet Ingredients:
Gradually add the flour mixture into the wet ingredients while mixing on low speed. Keep combining until the dough comes together but be careful not to overmix, as this could make the cookies tough!
3. Chill the Dough:
Divide the dough into two discs. Wrap each disc in plastic wrap and place them in the refrigerator for at least 1 hour until the dough is firm. This step helps prevent the cookies from spreading too much when baking.
4. Preheat and Prepare for Baking:
While the dough chills, preheat your oven to 350°F (175°C) and line baking sheets with parchment paper. This makes for easy cleanup and prevents the cookies from sticking.
5. Roll Out and Cut the Cookies:
On a lightly floured surface, roll out one disc of dough to about 1/4-inch thickness. Use festive Christmas-themed cookie cutters like snowflakes, Christmas trees, and snowmen to cut out shapes. Carefully transfer the shaped cookies onto the prepared baking sheets.
6. Bake the Cookies:
Bake the cookies for 8-10 minutes or until the edges are just barely golden. Once baked, allow them to cool on the baking sheets for a few minutes before transferring them to a wire rack to cool completely.
7. Prepare the Royal Icing for Decorating:
In a large bowl, combine the sifted powdered sugar and meringue powder. Gradually add warm water while mixing on low speed until the icing holds stiff peaks—this should take about 7-10 minutes. Adjust the icing to your preferred consistency by adding more water (to thin it) or more powdered sugar (to thicken it). You want it to be smooth but not runny!
8. Decorate the Cookies:
Divide the royal icing into smaller bowls and tint with food coloring as desired. Use piping bags or squeeze bottles to decorate the completely cooled cookies with festive designs like snowflakes, Christmas trees, and snowmen.
9. Final Touch:
Allow the icing to dry completely at room temperature before you stack or package the cookies. This will help prevent the icing from smudging and ensure your decorated cookies look perfect!
Enjoy your beautifully decorated Christmas sugar cookies, perfect for gift-giving or any holiday celebration!
Can I Use Margarine Instead of Butter?
Yes, you can substitute margarine for butter, but it may affect the flavor and texture slightly. For best results, use a stick-form margarine that’s specifically designed for baking to ensure a similar consistency.
How Do I Store Leftover Cookies?
Store any leftover cookies in an airtight container at room temperature for up to 1 week. If you want them to last longer, you can freeze them for up to 3 months. Just make sure they are well wrapped to prevent freezer burn!
What Can I Use Instead of Meringue Powder in Royal Icing?
If you don’t have meringue powder, you can substitute it with egg whites. Use two egg whites for every 3 tablespoons of meringue powder. Keep in mind that using fresh egg whites may make the icing less stable and may require refrigeration.
How Can I Make These Cookies More Colorful?
To make your cookies more vibrant, use a variety of colored sprinkles and edible glitter on top of the royal icing after decorating. You can also mix in different food coloring shades into the icing to create custom colors for your designs!


