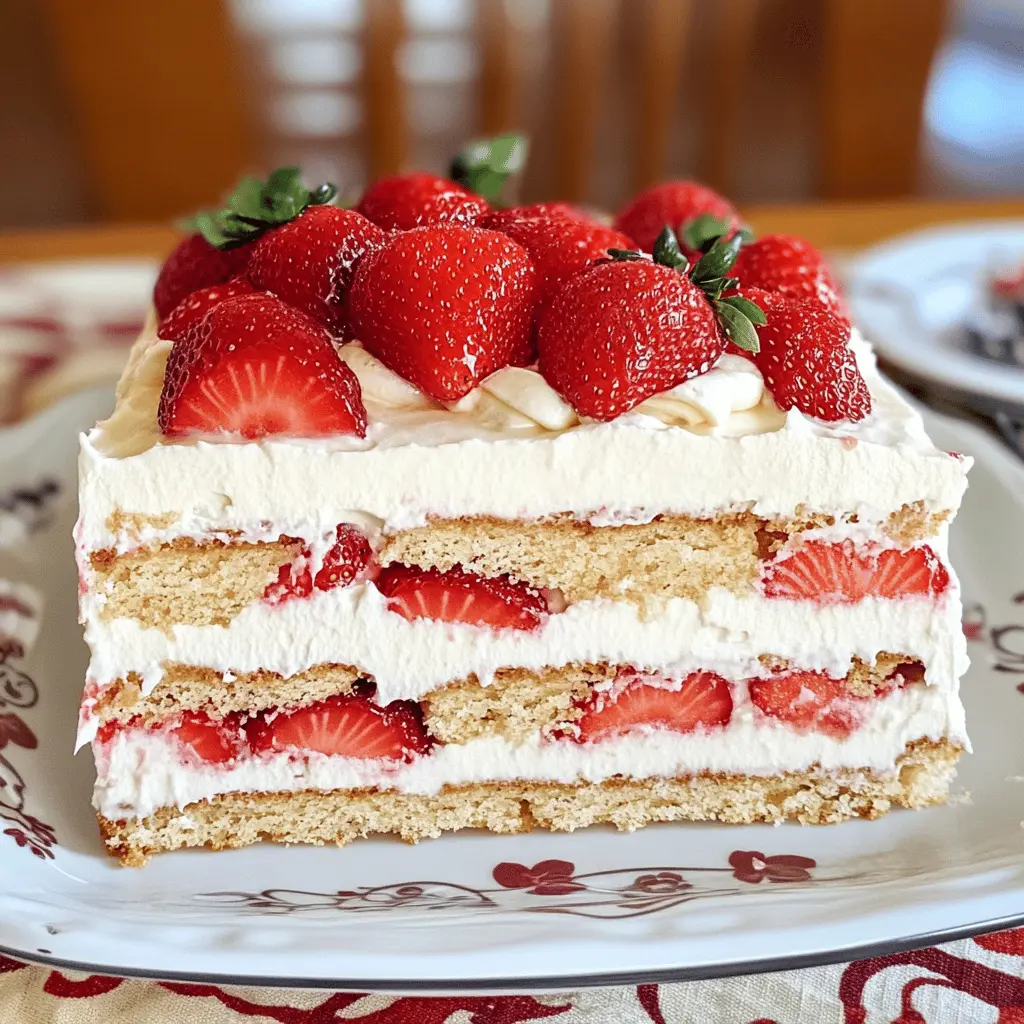
This Strawberry Icebox Cake is a no-bake treat that’s perfect for hot days! With layers of creamy whipped topping and fresh strawberries between sweet cookies, it’s a dreamy delight!
You’ll love how easy this cake is to make—just layer, chill, and serve! It’s a sweet summer favorite that never fails to impress. Trust me, everyone will want seconds! 🍓
Key Ingredients & Substitutions
Heavy Whipping Cream: This is essential for a rich and fluffy texture. If you want a lighter option, you can use whipped topping, though it won’t be as creamy. I prefer the taste of real cream, but both work well.
Powdered Sugar: This sweetens your whipped cream nicely. If you’re looking to reduce sugar, you can use a sugar substitute or cut the amount. I find that a little less sugar allows the strawberries’ natural sweetness to shine through.
Fresh Strawberries: These are a must for the flavor! If strawberries aren’t in season, you can use other fruits like blueberries or raspberries. Frozen strawberries can also work, but be sure to thaw and drain them first to avoid excess moisture.
Graham Crackers: Classic for the base, but you can also swap them out for digestive biscuits or even chocolate wafers for a different twist. Although I love the traditional flavor, experimenting can lead to yummy surprises!
What’s the Best Way to Achieve Stiff Peaks When Whipping Cream?
Getting the right texture when whipping cream is crucial. Stiff peaks mean the cream holds its shape and gives the cake a light texture. Here’s how to get there:
- Start with cold cream. Chill your bowl and beaters for about 15 minutes before whipping.
- Combine cream, powdered sugar, and vanilla extract together first.
- Beat on medium speed until you see soft peaks, then increase to medium-high speed.
- Look for peaks that stand straight up when you lift the beaters out of the cream. Stop beating as soon as you see this to avoid butter!
With these tips, you’ll have perfect whipped cream, ensuring your icebox cake is a hit!
How to Make Strawberry Icebox Cake (No Bake)
Ingredients You’ll Need:
For the Whipped Cream:
- 2 cups heavy whipping cream
- 1 cup powdered sugar
- 1 teaspoon vanilla extract
For the Cake Layers:
- 1 pound fresh strawberries, hulled and sliced
- 1 package (14.1 oz) graham crackers
- Additional strawberries for garnish
How Much Time Will You Need?
This no-bake strawberry icebox cake takes about 20 minutes to prepare, plus at least 4 hours to chill in the refrigerator. You can also make it a day ahead for even better flavor as it sets. So, it’s perfect for planning ahead for a special occasion!
Step-by-Step Instructions:
1. Make the Whipped Cream:
In a mixing bowl, add the heavy whipping cream, powdered sugar, and vanilla extract. Use an electric mixer on medium-high speed to beat the mixture until you see stiff peaks forming. This means it will hold its shape nicely when layered.
2. Prepare the Baking Dish:
Grab a 9×13 inch baking dish and spread a thin layer of the whipped cream mixture on the bottom. This first layer helps the graham crackers stick and adds that creamy goodness from the start!
3. Layer with Graham Crackers:
Now, place a layer of graham crackers over the whipped cream. Don’t worry if some pieces are too big; you can break them as needed to fit snugly in your dish. This will be the crunchy, delicious base of your cake.
4. Add More Whipped Cream and Strawberries:
Spread another layer of the whipped cream mixture over the graham crackers. Next, add a layer of the sliced strawberries on top—this will add a burst of fruity flavor to your cake!
5. Repeat the Layers:
Keep stacking! Alternate between layers of graham crackers, whipped cream, and strawberries until you’ve used all your ingredients. Remember to finish with a smooth layer of whipped cream on the top.
6. Garnish with Strawberries:
To make it look extra special, arrange the remaining sliced strawberries on top of the final whipped cream layer. This will add a beautiful pop of color and make it look delicious!
7. Chill and Set:
Cover the dish with plastic wrap and refrigerate for at least 4 hours, or even better, overnight. This chilling time allows the graham crackers to soften and all the flavors to blend perfectly together.
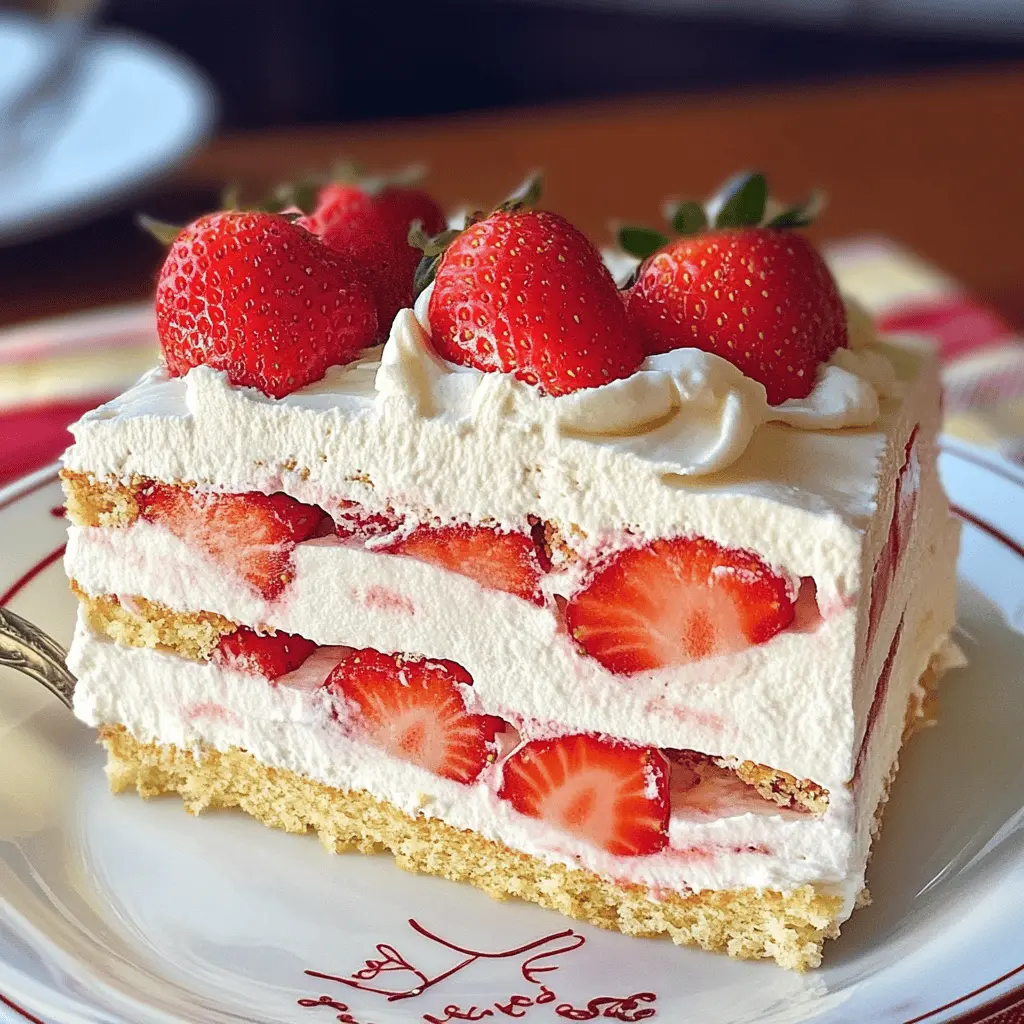
8. Serve and Enjoy:
When you’re ready to enjoy your icebox cake, slice it into squares and serve! Each bite will be creamy, fruity, and oh-so-delicious. Enjoy your refreshing treat!
Can I Substitute the Heavy Whipping Cream?
Yes! If you’re looking for a lighter option, you can use whipped topping instead of heavy whipping cream. Just follow the package instructions to prepare it. However, if you want a dairy-free alternative, try using coconut cream for a similar texture and flavor.
What Can I Use Instead of Graham Crackers?
If you don’t have graham crackers, you can substitute them with digestive biscuits or vanilla wafers. Both options will still give you a delicious base. For a gluten-free version, look for gluten-free graham crackers or nut-based crusts!
Can I Make This Cake in Advance?
Absolutely! This cake actually tastes better when made a day ahead since it allows the flavors to meld together. Just keep it covered in the refrigerator until you’re ready to serve it. You can store it for up to 3 days!
How Should I Store Leftovers?
Store any leftover strawberry icebox cake in an airtight container in the refrigerator for up to 3 days. If the strawberries start to lose their freshness, you can remove them and add fresh ones before serving for the best flavor!